Before fieldwork confirm that you have the following items if needed
-
Batteries, charged
-
Data logger and GPS units both use the GEB211/GEB212 batteries
- You can also use a car battery and cable, Leica external battery or a car adapter
- Two batteries can be installed in GPS at same time and operate unit for 10-15+ hours – largely deposing on radio use.
-
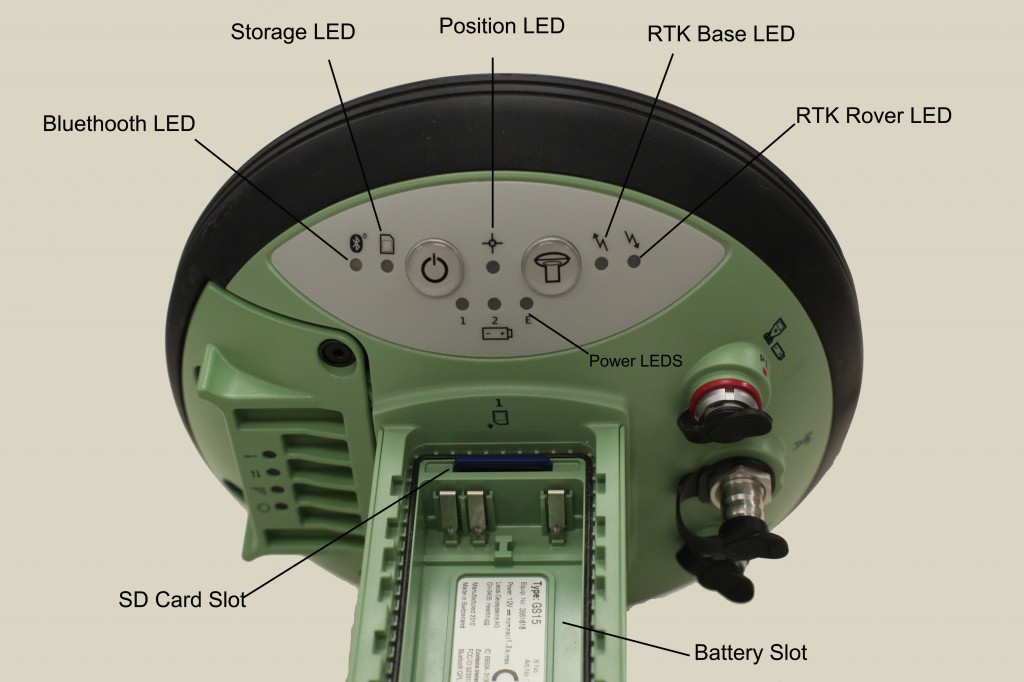
Installation of batteries in GPS is described on Page 41-42 of GS15 User’s Manual
- With battery contacts facing upwards, slide battery into cover
- Push battery into cover until it locks
- Insert cover of battery and battery into slot
- Lock battery into slot by pushing side fastener as directed by arrows
- This works for both battery compartments.
- Reverse steps to unlock and remove battery
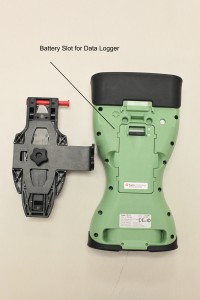
Installation of batteries in data logger is described on page 46-47 of CS15 User’s manual
You can hot-swap one of the two batteries. In operation battery status on GPS is shown via “Power LEDs”. One battery will be “active” one “passive”
Information on these on pages 64-67 of GS15 User’s manual
Power LED (Active Battery)
- No light battery is not connected, flat or GS15 is not on
- Green light power is 40-100%
- Yellow light power is 20-40%
- Red light power is 5-20%
- Fast flashing red light power is low <5%
For the passive batteries it is the same except the LED light flashes once every 10 seconds
Battery charging
-
If using for longer than one day plan to take the Leica battery charger unit
- Note that the same charger charges both GPS and C10 batteries
- External power supply (e.g. 120v – GEV235) for data logger also charges batteries in the logger. There is a GEV235 power supply in each of the cases. The data logger has the same batteries as in GPS so – in a pinch – this can be a battery charging workaround.
-
Refer to Leica Battery Charging (GKL221) manual for details on what the lights mean. BUT – the basics are
- Yellow – the batteries in the bay have been recognized BUT the batteries in the other bay (each holds two batteries) are currently being charged. It will automatically switch when the other bay is charged.
- Green – the battery is being charged
- Flashing green – the battery is fully charged.
- You can leave the batteries in the charger with the charger plugged in w/out any harm to batteries and this will insure that they are fully charged when you need it. The charger actually cycles through a charge/discharge cycle.

