This page will show you how to set the parameters on a Leica CS15 field controller in preparation for GPS survey.
Hint: You can click on any image to see a larger version.
[wptabs mode=”vertical”]
[wptabtitle] Power up the CS15[/wptabtitle]
[wptabcontent]
Power on the CS15 controller by pressing and holding the power button until the screen turns on. The operating system will take a minute to boot up, and will automatically start up the Leica Smartworks interface. Click “No” if the bluetooth connections Warning message pops up.
You may get the Welcome screen. If so, click “Next”.

[/wptabcontent]
[wptabtitle] Choose Survey Instrument[/wptabtitle]
[wptabcontent]
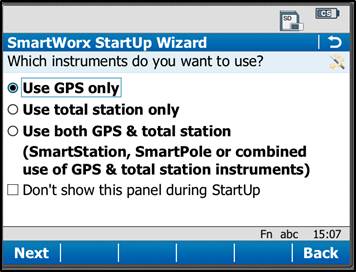
After powering on the controller, you may see the SmartWorx StartUp wizard. Confirm that “GPS Instrument” is selected in the drop-down in the “First Measure with:” menu, or the “use GPS only” radio box.
[wptabtitle]Choose a Job [/wptabtitle]
[wptabcontent]
If these have been turned off by previous users, then the first screen that appears will allow you to “Continue with last used job,” create a “New Job,” or “Choose working Job.” For the purposes of this guide, select “New Job” and tap “Next” in the lower left corner.

Note that you can also use the “F” key below each entry. So pressing F1 which is below “Next” is the same as using the stylus and clicking on the touch screen. Pressing F6 is the same as pressing the stylus on Back.

[wptabtitle] Set Job Description[/wptabtitle]
[wptabcontent]
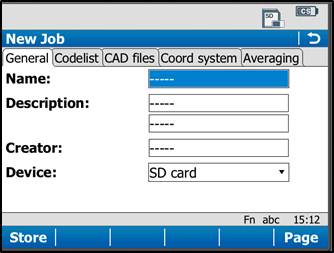
On the General Tab, enter a name for the job, a description, and the name of the person who is creating the job. Be sure to choose “SD Card” for the Device option, as this will result in all the data generated within the job to be saved only to the SD Card.
[wptabtitle]Set Coordinate System[/wptabtitle]
[wptabcontent]
On the “Coord system” tab, be sure the coordinate system is set to “WGS84basic.” If it needs to be changed to this, just tap on the drop down menu, select “WGS84basic,” and tap OK in the lower left corner. You have the ability to create a custom coordinate system if needed (more information can be found in the Leica Technical Manual).
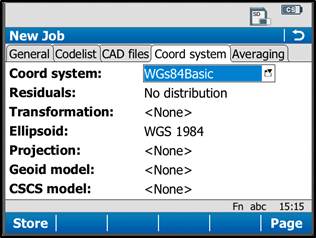
Tap “Store” in the lower left corner to save the job and go to the main menu.
Note: It is beneficial to learn what the icons along the top of the screen represent. For detailed information, see the Leica “Getting Started Guide” section 2.1.2, pages 51-54. Additionally, a brief and simple presentation of the main menu options can be found in the Leica “Getting Started Guide” section 2.1.3, pages 55-57.
[wptabtitle]Continue To…[/wptabtitle]
[wptabcontent]
Continue to Part 3 of the series, “Leica GS15 RTK: Configuring a GS15 Receiver as a Base.”
[/wptabs]