[wptabs mode=”vertical”] [wptabtitle] What is OpenCTM?[/wptabtitle] [wptabcontent]OpenCTM is a new open source file format for 3D objects that boasts impressive compression capabilities. Using OpenCTM, a 90 megabyte model compresses to 9 megabytes. This makes OpenCTM ideal for web delivery. Although there are still many kinks to iron out, the following tutorial explains how to create an OpenCTM from a 3D model and place it on the web using WebGL and JavaScript. [/wptabcontent]
[wptabtitle] Demo files[/wptabtitle] [wptabcontent]The web viewing script is here as a zip file. You will need a functional web server to place the files in. The script loads the model through an XMLHttpRequest, which requires the web page be loaded from an http server. The model won’t load if the web page is opened from the hard drive. [/wptabcontent]
[wptabtitle] OpenCTM and Meshlab[/wptabtitle] [wptabcontent]The easiest way to convert a model to OpenCTM is to use the open source 3D modelling program MeshLab. Once you have imported the mode into MeshLab, we will perform a number of steps to prepare the model for web delivery. [/wptabcontent]
[wptabtitle] Texture to Vertex Color[/wptabtitle] [wptabcontent]
1.The current JavaScript doesn’t support textures, but uses vertex color instead. To convert textures to vertex color, in MeshLab go to Filter > Texture to Vertex Color (between 2 meshes)
2.Make sure the Source Mesh and Target Mesh are the same. Then press Apply.
3.Toggle the textures off to check if the conversion was successful. Render > Render Mode > Texture. You can also find the icon in the main toolbar.
4.If the texture still appears to be shown on the model after toggling the textures off, you know that the Texture to Vertex color was successful.
[/wptabcontent]
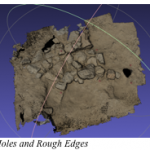
[wptabtitle] Cleaning the Mesh[/wptabtitle] [wptabcontent]The web viewer can be temperamental about mesh geometry. If there are too many holes or rough edges, the script could cause the browser to crash or hang up indefinitely. The solution is to perform a number of steps that will clean the geometry enough for the web viewer script to be satisfied. [/wptabcontent]
[wptabtitle] Preliminary Cleaning[/wptabtitle] [wptabcontent]
1. Filters > Cleaning and Repairing > Close Merged Vertices
2. Filters > Cleaning and Repairing > Remove Duplicated Face
3. Filters > Cleaning and Repairing > Remove Duplicated Vertices
4. Remove Face from Non Manif Edges
These steps are the preliminary cleaning methods before export. After you complete these steps, export the mesh and try to load it in the browser. If the model loads, all is well. If the browser hangs up or crashes, we’ll have to perform additional cleaning steps
[/wptabcontent]
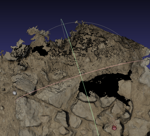
[wptabtitle] Manual Cleaning[/wptabtitle] [wptabcontent]For manual cleaning, we need to cut any section of the mesh that appears questionable. Typically this will be near and on the edges of the mesh. The screenshot below gives a good impression of what to look for.
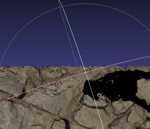
1. Rotate the model so that the section in question is horizontal.

[/wptabcontent]
[wptabtitle] Manual Cleaning 2[/wptabtitle] [wptabcontent]
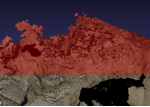
2. Click Edit > Select Faces in a Rectangular Region
3. Drag and select the area in question

[/wptabcontent]
[wptabtitle] Manual Cleaning 3[/wptabtitle] [wptabcontent]4. Click Filter > Selection > Delete Selected Face and Vertices

5. Repeat for other questionable sections of the mesh
6. Export
[/wptabcontent]
[wptabtitle] Exporting[/wptabtitle] [wptabcontent]Whenever you want to give the model a test run, you’ll export it out as a OpenCtm file.
1. Go to File > Export Mesh as
2. In the Files of type below, select “OpenCTM compressed file (*.ctm)” from the dropdown men
If OpenCTM is not an available option for export, you may need a more recent version of Meshlab
3. Save as…
Be sure you save the model on the web server where the javascript file is located.
[/wptabcontent]
[wptabtitle] View Your Results[/wptabtitle] [wptabcontent]To see the model in the web viewer, we’ll need to open up the demo.html file and change one line of code.
1. Open the demo.html file in your favorite editor.
2. On line 72, you will find in quotes the string “changeME.ctm”
3. Change this to the name of the model. If you named the model “myCoolModel.ctm”, you want to add “myCoolModel.ctm” with quotes. If you placed the model in a folder, be sure to add the directory as well, like this “/myModels/myCoolModel.ctm.”
4. Open the website. If you placed it on a local webserver, the address will be something like “http://localhost/demo.html.” if you placed the web scripts and model on a different server, use the name of the server.
NB: Once you have exported as OpenCTM, you can also export out as OBJ for a Unity model as well.
[/wptabcontent] [/wptabs]
