Taste of Unity
Navigation:
in the scene
left click: pan right click: zoom alt + left: orbit around center
in the game
uses WASD controls
W: forward
A: left
S: backwards
D: right mouse: moves your view
Importing a SketchUp model into Unity
Unity provides users a free version of the development application for personal and commercial use. Some features are not available on the free Unity package.
- Register, double click on the Unity Icon. Select Internet activation and follow the directions.
- Open Unity, load Islands.unity (File > Open scene, Unity should automatically locate the file)
- Basics of Unity: Main Editor Window
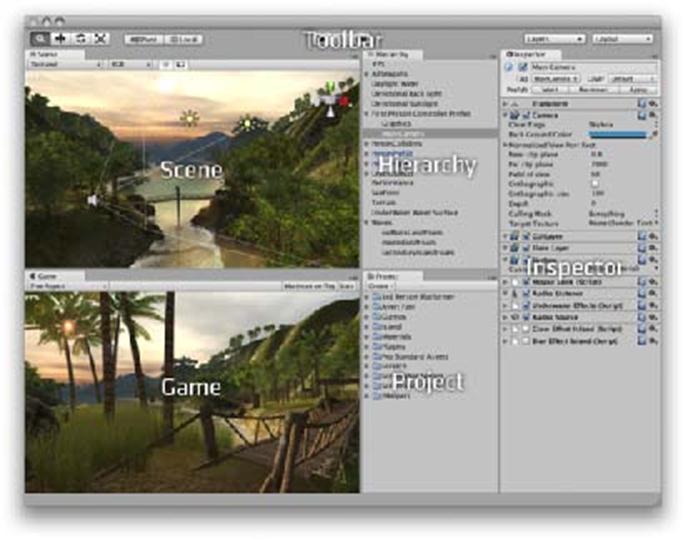
Every Unity project contains an Assets folder. The contents of this folder are presented in the Project View. This is where you store all the assets that make up your game, like scenes, scripts, 3D models, textures, audio files, and Prefabs. If you right-click on any asset in the Project View, you can choose Reveal in Finder (Reveal in Explorer on Windows) to actually see the asset itself in your file system.
Important Note: You should never move project assets around using the OS since this will break any metadata associated with the asset. Always use the Project View to organize your assets.
Scene View
This is where you will build the game, create interactions and set controls. Use the mouse and alt button to move around.
Game View
This gives you a rendered game version of your scene and lets you test the interactions and controls. To navigate around, press the play button and use the WASD keys and mouse.
- In scene view, fly to a spot on the beach near the bridge. In the project window, select Create > Folder and create a new folder, name it SU. Now right click on the SU folder and select Show in Folder. Note where the folder is, you will save your model in SketchUp to this folder. This is the Assests folder.
- Minimize Unity and open SketchUp.
- Select Get Models icon, search for “beach chair” and download. Place model at the center of the scene on the axis.
- File > Export > 3D model Change drop down list to “3DS File”, select option, check that Export two-sided faces As materials and Export texture maps Favor Preserving texture coordinates are selected, click OK, name the file “beach_chair” and then Export to the SU folder created in Unity (see step #4).
- In Unity, expand the SU folder in the Projects view. Select the beach chair and drag it to the scene, try to place it on the beach. Now translate and scale the beach chair so that it is located correctly and appropriately sized.
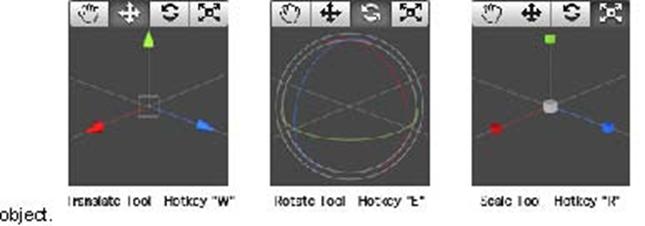
Transform Tool

When the hand icon is selected this will allow you to navigate around the scene. Selecting the other icons will let you translate, rotate or scale an
- Test the scene, select the play icon to switch to game mode. Navigate to the beach chair and have a seat.
- Switch to SketchUp and change the chair’s texture. Re-export the model to the Unity Assets folder. Now switch back to Unity, the beach chair will now show the changes made in SketchUp.