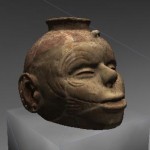
This series of posts will teach you how to navigate in Unity and to create a basic virtual museum.
Hint: You can click on any image to see a larger version.
[wptabs mode=”vertical”]
[wptabtitle] Basic Importing[/wptabtitle] [wptabcontent]Unity3D reads these file formats natively:
-FBX : an AutoDesk format designed for interoperability
-.dae : Collada format *
-. 3ds: 3D Studio Max
-.dxf : Drawing Interchange Format, a format used for interoperability between AutoCad and other programs
-.obj : Wavefront Object, an open and fairly common 3D model format
If you are working in a 3D modelling application and are able to export in one of these formats, Unity will be able to read it. Export the file into the Assets folder and the object will appear in your Project panel in Unity. For best results, always import as .fbx or .obj files. Unity works best with these particularly when it comes to scale.
FBX Converter
Autodesk supplies a free FBX converter on their website. You can find it here: http://usa.autodesk.com/adsk/servlet/pc/item?id=10775855&siteID=123112. [/wptabcontent]
[wptabtitle] Automatic Import[/wptabtitle] [wptabcontent]Unity is able to automatically import a number of 3D models from the following proprietary vendor format. The links will take you to Unity’s reference manual where you can find a fuller discussion of the vendor format.
● Maya
● Cinema 4D
● 3ds Max
● Cheetah3D
● Modo
● Lightwave
● Blender
If you save the scene from any of these modeling packages to the Asset folder you are working in, Unity will automatically import them in the project. You can freely go to and fro Unity and the modeling package and all edits will be reflected in Unity.
[/wptabcontent]
[wptabtitle] 2D Assets[/wptabtitle] [wptabcontent]Similarly, Unity reads Photoshop files natively so you can save your .psd files straight into the Assets folder. It’s a good idea to create a folder named Textures to keep your files organized. Using the Photoshop documents natively allow you to make edits and see the results quickly in Unity. However, you may see a lost in quality using Photoshop Documents. To avoid this, try using 24 bit PNG files. An advisable organization strategy is to save your PSD files in a folder called PhotoshopOriginals and export the png files into the Texture folder in your Asset folder. [/wptabcontent]
[wptabtitle] Continue…[/wptabtitle] [wptabcontent]Continue to read about Unity here…
