This page will show you the basic instrument components needed for a Leica GS15 RTK GPS survey and will review memory card maintenance.
Hint: You can click on any image to see a larger version.
[wptabs mode=”vertical”]
[wptabtitle] Instrument Components[/wptabtitle]
[wptabcontent]
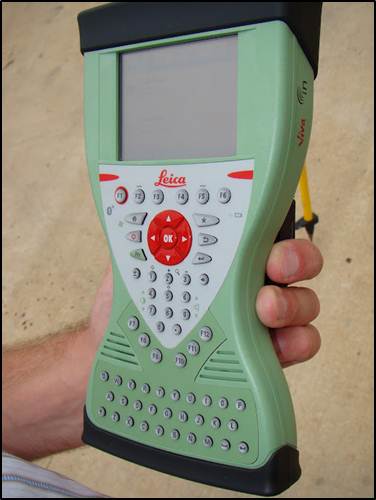
GS15 GNSS receiver (left) and CS15 field controller (right)
[/wptabcontent]
[wptabtitle] Equipment Check List [/wptabtitle]
[wptabcontent]
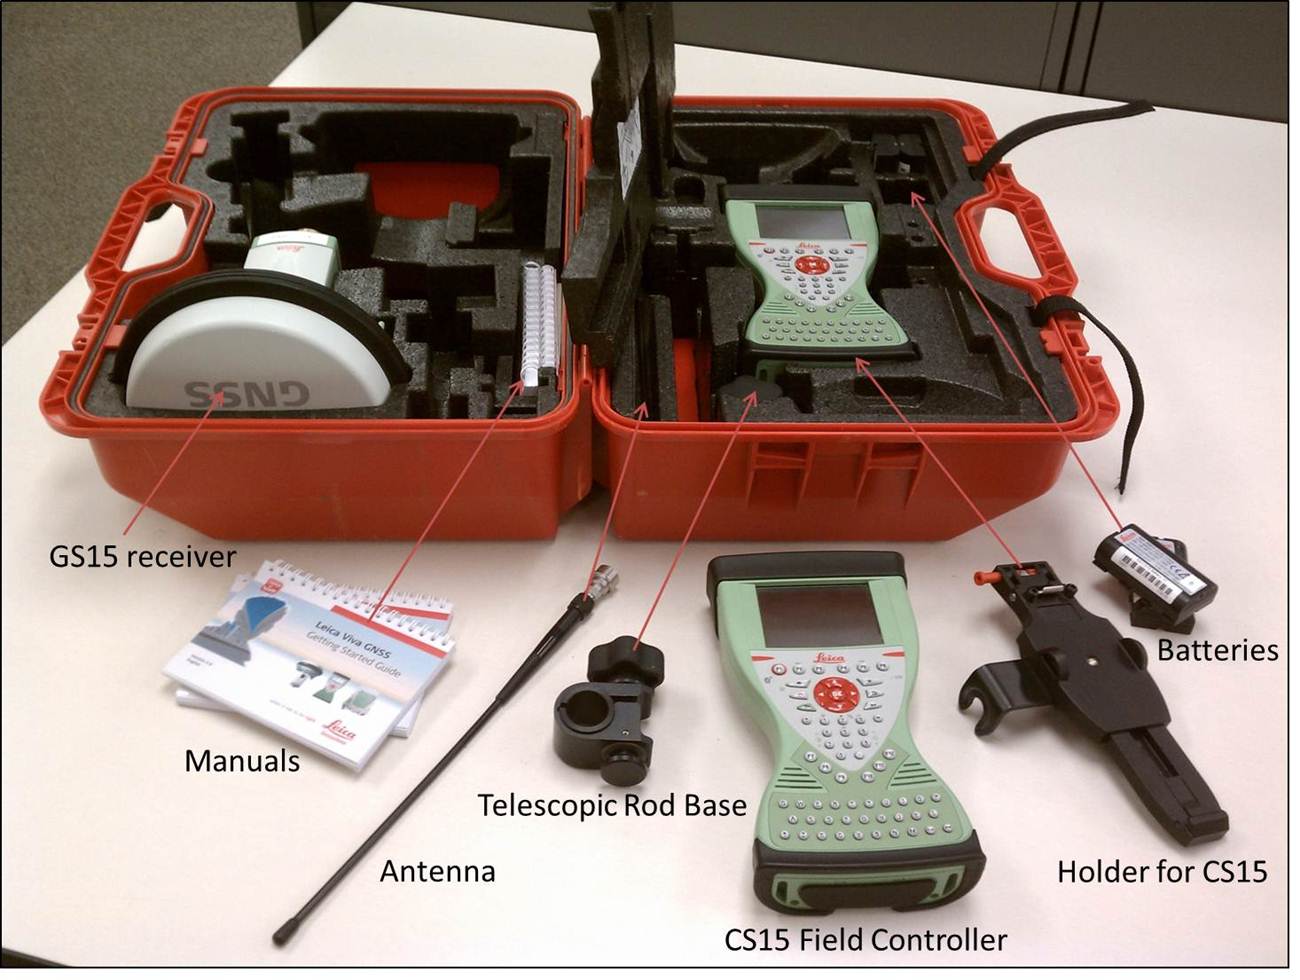
Minimum equipment and accessories needed (contents of instrument kit):
- • GS15 receiver (2)
- • CS15 field controller (1)
- • Antennas (2 – one for each GS15)
- • Holder for CS15 (1)
- • Base for telescopic rod (1)
- • Batteries
- 5 or more (two for each GS15 and one for the CS15, more depending on length of survey)
- Confirm that batteries are charged
- • SD cards
- Enough for each instrument (GS15 and CS15)
- Leica recommends 1GB
- Confirm that cards are not locked via the mechanical locks
- • Manuals
- Leica Viva GNSS Getting Started Guide
- Leica GS10/GS15 User Manual

-
Instruments and their locations in the kit.
[/wptabcontent]
[wptabtitle] Memory Card and Data Maintenance [/wptabtitle]
[wptabcontent]
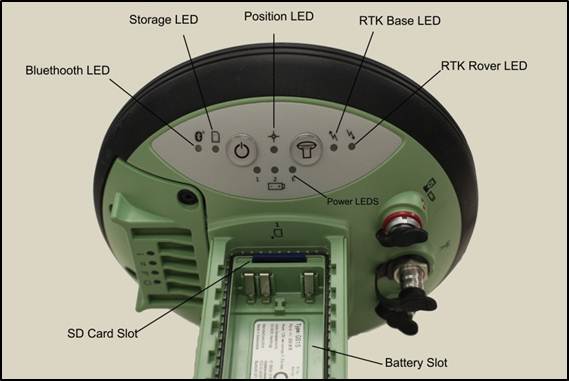
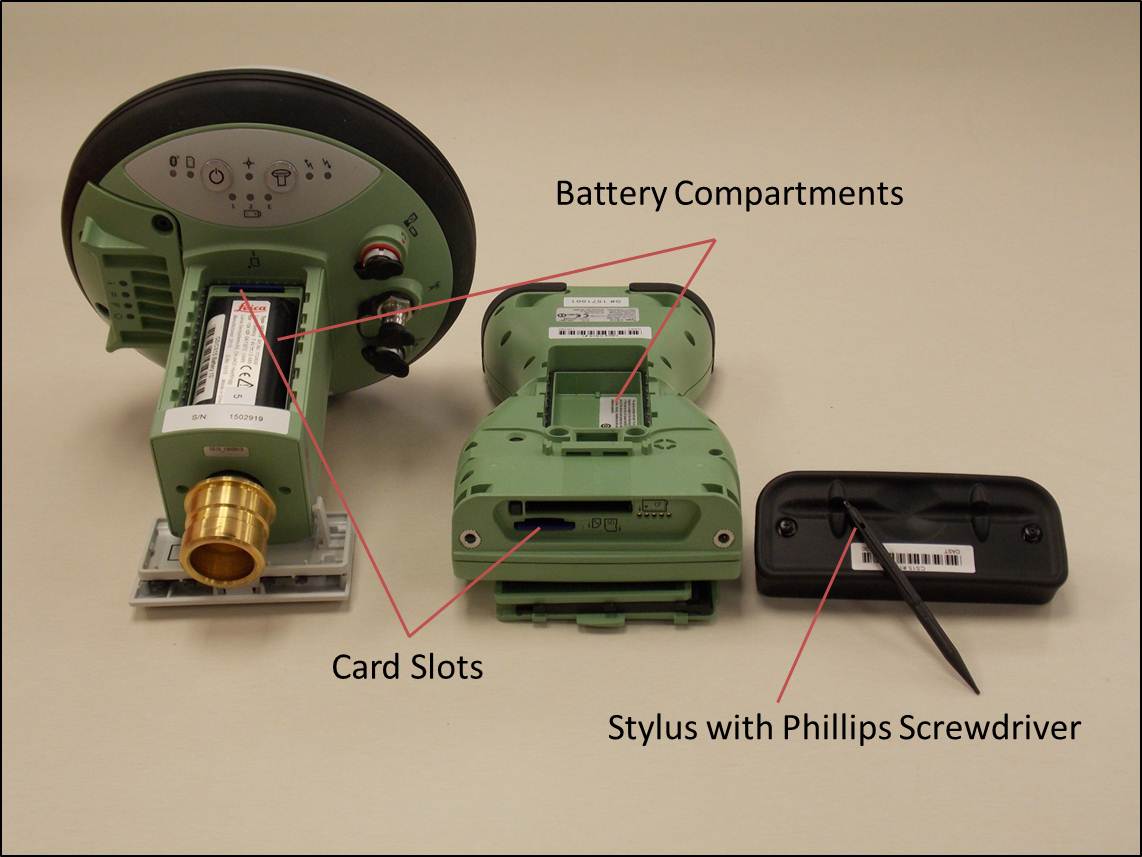
Make sure memory cards have adequate space for your data needs. The GS15 receivers hold one memory card, which can be accessed in the battery compartment beneath the power button. The CS15 controller also holds a memory card, which can be accessed by using the Phillips screwdriver end of the stylus to loosen the screws on top of the unit. These screws are spring loaded and only take about a half turn to loosen.
If you are recording Leica data (for example Leica MDX), the files will be found on the SD card in the DBX directory. If you are recording RINEX, the data will be found in DATA> GPS > RINEX.
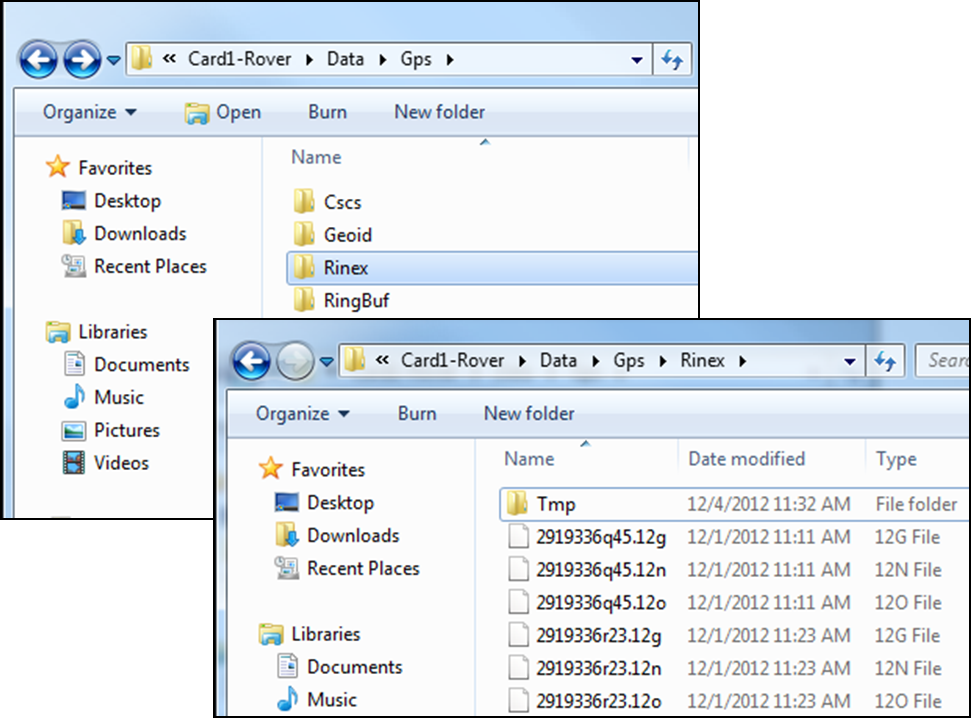
- Note: The raw data files have the following format AAAA_BBBB_CCCCCC with the suffix .m00 for raw Leica data (the suffix .12o is for RINEX). The letters are AAAA = last four numbers of the unit’s serial number BBBB is the date in month and day so 0405 is the fourth month (April) and fifth day. CCCCCC is the hour (two digit 24 hour clock) minute and second. So 5:34 and 21 seconds PM is 173421. This is then followed by .m00 if it is RAW. Note that OPUS will now take Leica RAW as well as RINEX.
- *Only delete data from the SD card if it is your own work, or if the original owner has backed up the data. *
[/wptabcontent]
[wptabtitle] Inserting Memory Cards and Batteries [/wptabtitle]
If you plan to record to the controller, place one SD card into the CS15 and secure the top back in place by tightening the screws about a half turn until they lock with the Phillips screwdriver end of the stylus. You do not NEED to record to the controller but it may provide redundancy. Place the other SD card into one of the GS15 receivers. The GS15 that has the memory card will be used as the base station (you may set the rover to write to the controller).
Insert fully charged Lithium Ion batteries into all devices. The GS15 receivers can hold 2 batteries, which are stored below the antenna portion of the unit in the compartments on either side. The battery for the CS15 is located in a compartment on the back. To access this compartment, you will likely have to remove the mounting base first. To do this, slide the red bar to the right in order to unlock the mount. Gently wiggle the mount and pull away from the CS15 to detach it. The battery compartment is now accessible. Replace the mount by popping it back into place and slide the red bar all the way back to left, which locks the mount to the CS15 controller.
[wptabtitle] Continue To… [/wptabtitle]
[wptabcontent]
Continue to Part 2 of the Series, “Leica GS15 RTK: Configuring the CS15 Field Controller.”
[/wptabcontent]
[/wptabs]