Having successfully set up the Breuckmann SmartSCAN HE as described in the Breuckmann SmartSCAN Setup Workflow, you are now ready to set up the parameters for your project and save them as a template.
BEGINNING YOUR OPTOCAT PROJECT:
[wptabs style=”wpui-alma” mode=”vertical”]
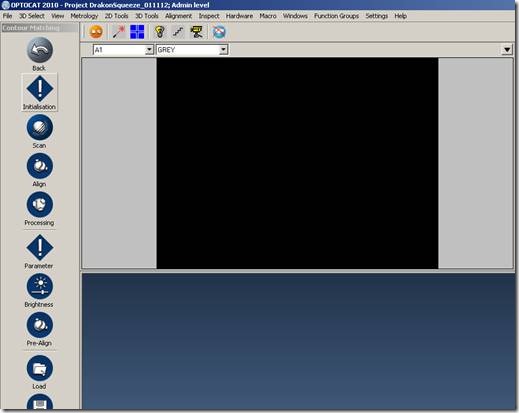
[wptabtitle] INITIALIZE PROJECT[/wptabtitle] [wptabcontent]1. Initialize a Project by clicking in the main left-hand menu on Scan>Contour Matching> Initialization (assuming you are not using the turntable in your project). A pop-up menu will appear where you can create a new project and select the directory where it will be stored, or you can initialize an existing project.
[wptabtitle] CREATE TEMPLATE[/wptabtitle]
[wptabcontent]2. Once you have created or initialized a project a second pop-up menu will appear providing options for using a template for the project settings. Select the Full template, or a custom template you have created.
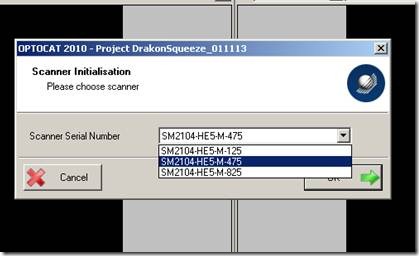
3. In the third pop-up menu, select the lens size you are using from the scanner serial number dialogue box. The lens size is appended to the end of the scanner serial number.
[wptabtitle] POP UP MENU[/wptabtitle]
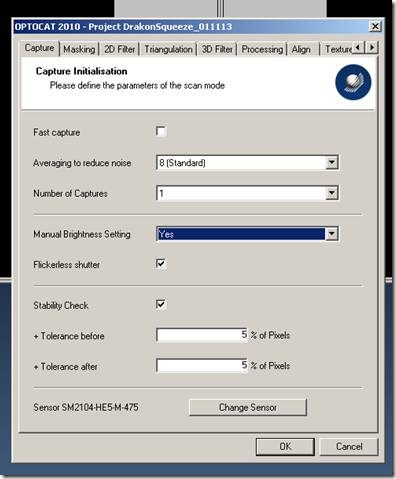
[wptabcontent]4. A fourth pop-up menu will now appear with a series of tabs along the top. Work your way through the tabs checking that the options are set as described below. If the parameters of an option are not specified, leave the defaults.[/wptabcontent]
[wptabtitle] CAPTURE TAB[/wptabtitle]
[wptabcontent]In the Capture tab set the Averaging to reduce noise option to 8 (Standard) and check the box next to Flickerless Shutter if you are working under fluorescent lights.
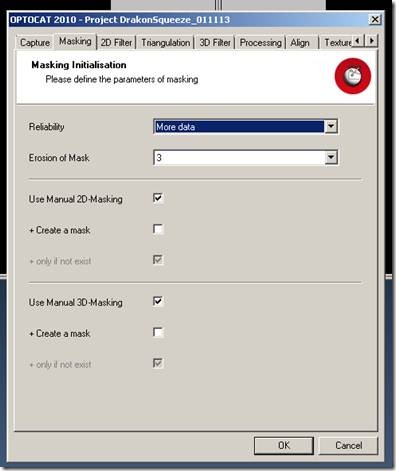
[wptabtitle] MASKING TAB[/wptabtitle] [wptabcontent] In the Masking tab set Reliability to More Data.
[wptabtitle] FLITER TAB[/wptabtitle] [wptabcontent] In the 2D Filter tab select No Filter
[/wptabcontent]
[wptabtitle] TRIANGULATION TAB[/wptabtitle]
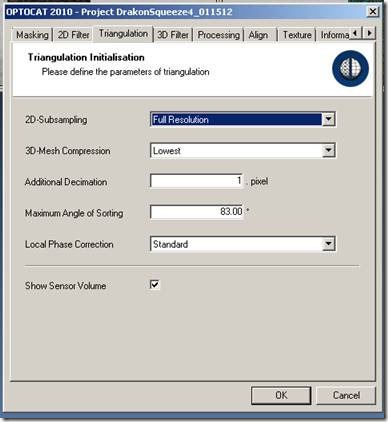
[wptabcontent]In the Triangulation tab set 2D-Subsampling to Full Resolution and set 3D-Mesh Compression to Lowest.
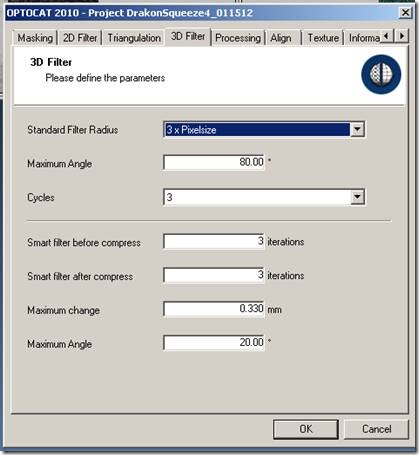
[wptabtitle] 3D FILTER TAB[/wptabtitle] [wptabcontent] In the 3D Filter tab set the Standard Filter size to 3x Pixelsize, set Cycles to 3, and leave all other parameters as the defaults.
In the Processing tab, leave the defaults.[/wptabcontent]
[wptabtitle] ALIGN TAB[/wptabtitle]
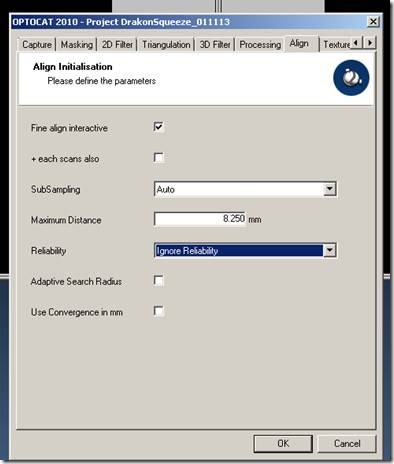
[wptabcontent] In the Align tab set Reliability to Ignore Reliability (counter-intuitive, we know!).
[wptabtitle] TEXTURE TAB[/wptabtitle]
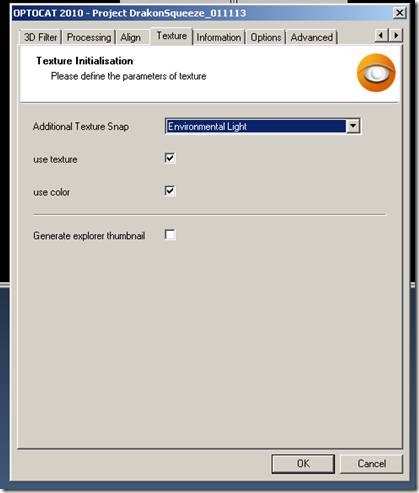
[wptabcontent] In the Texture tab check the boxes next to Use Texture and Use Color and set your lighting condition appropriately.
[wptabtitle] INFORMATION TAB[/wptabtitle]
[wptabcontent]
In the Information tab, fill in the metadata for your project.
[wptabtitle] OPTIONS TAB[/wptabtitle]
[wptabcontent] In the Options tab check the Mains Frequency and pick the correct setting for the country in which you are working.
[wptabtitle] ADVANCED TAB[/wptabtitle]
[wptabcontent] In the advanced tab, leave the defaults.
Click OK to accept your parameters for the project[/wptabcontent]
[wptabtitle] SAVE SETTINGS[/wptabtitle]
[wptabcontent]5. In the main menu select File and Save Settings as Template.[/wptabcontent]
[/wptabs]
