This page will show you how to configure a GPS receiver with TerraSync and how to set and navigate to waypoints.
Hint: You can click on any image to see a larger version.
This guide is written for use with TerraSync v.5.41. The instructions vary only slightly for earlier versions of the software. Reference the tab titled, Menu Hierarchy to become familiar with the terminology used in the instructions.
[wptabs mode=”vertical”]
[wptabtitle] Menu Hierarchy[/wptabtitle]
[wptabcontent]
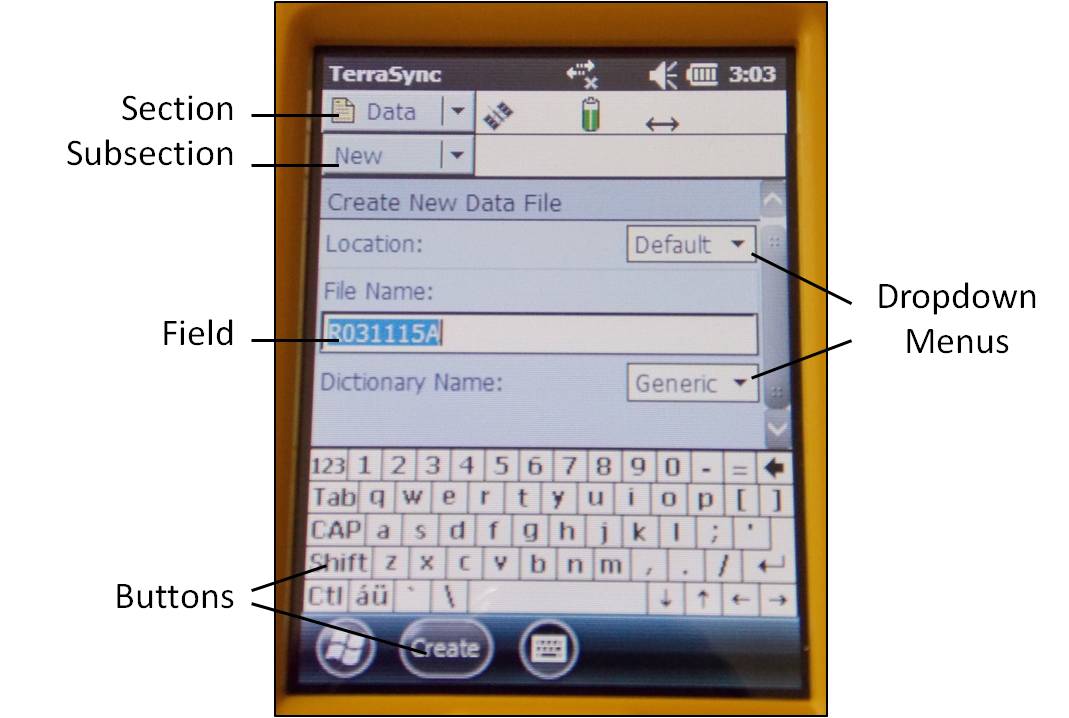
The TerraSync menu system hierarchy is as follows: sections, subsections, buttons, and fields (click on image below). The information provided in the tabs throughout this series will utilize this terminology.
[wptabtitle] Start Terra Sync and Connect to GNSS[/wptabtitle]
[wptabcontent]
Turn on the receiver by pressing the power button. Start TerraSync by opening the Start menu and selecting TerraSync from the menu options. In order to receive information from GNSS satellites, the GPS unit must be connected to the GNSS receiver. To connect to the GNSS receiver, go to the Setup section. Either expand the Options dropdown menu and choose “Connect to GNSS” or press the GNSS button in the upper-right of the screen.

[wptabtitle] Configure GNSS Settings[/wptabtitle]
[wptabcontent]
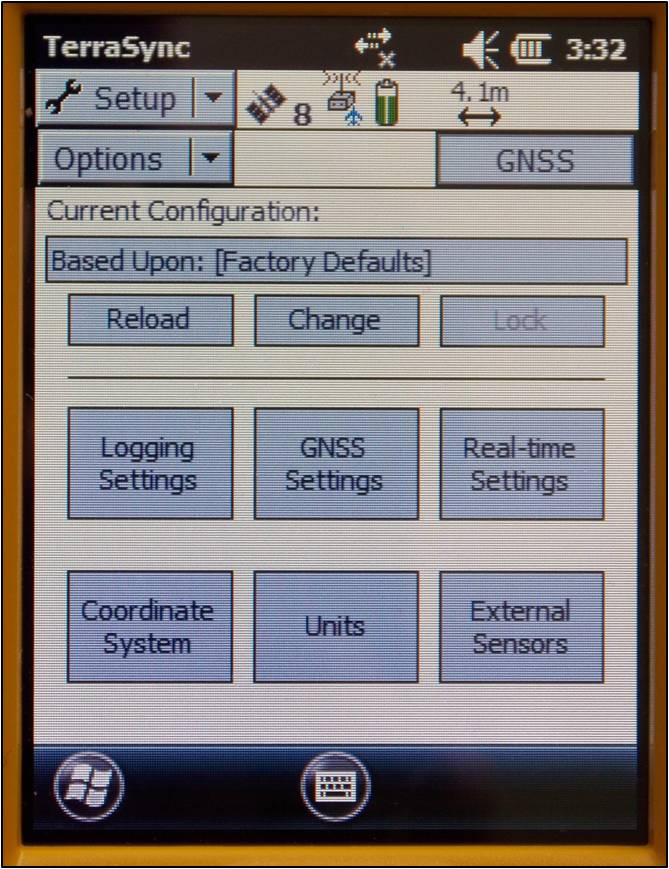
There are a variety of ways to configure the receiver for data collection under the Setup section in TerraSync. Open each of the six menus to verify that the parameters are set to the desired values. The following are a few parameters to be aware of:
Antenna Settings (under Logging Settings): If you are holding the receiver during data collection and not using an external antenna, you may set the antenna height to 1 meter (which is approximately the height of the receiver above the ground) and choose “Internal” under the Type dropdown menu. When using an external antenna, set the antenna height to the height of the tripod (or whatever height the antenna will be from the ground) and remember to choose the appropriate antenna from the Type dropdown menu.
Real-time Settings: Generally we set Choice 1 to Integrated SBAS, which provides corrections in real-time when a SBAS satellite is available. Set Choice 2 to Use Uncorrected GNSS. If Wait for Real-time is selected, only positions that have been differentially corrected will be used (meaning you may not be able to collect a position unless the receiver is able to make a real-time correction).
Coordinate System: Typically we use Latitude/Longitude with the WGS 1984 datum. However, there may be instances in which you will want to change the coordinate system.
[wptabtitle] Deleting Data[/wptabtitle]
[wptabcontent]
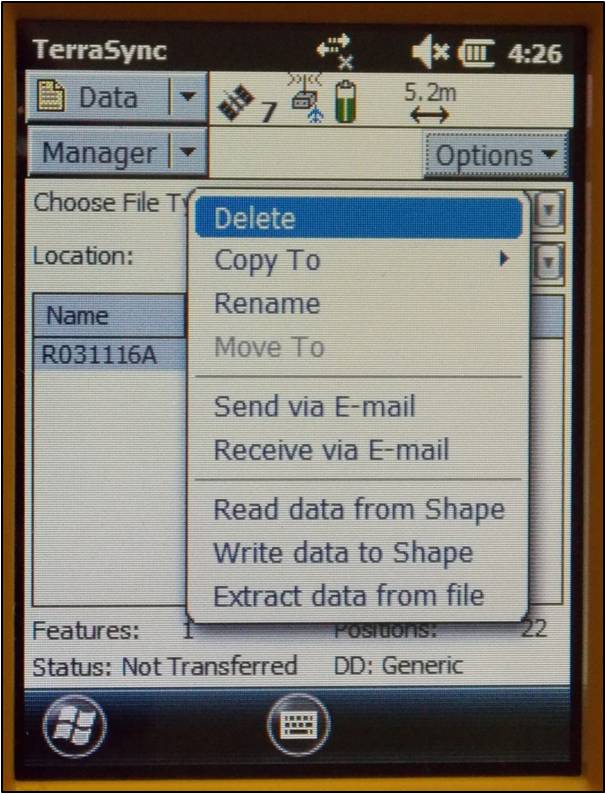
To delete data from the receiver, open the Data section and File Manager subsection. Expand the Choose File Type dropdown menu to select the type of file to delete. Note: It is recommended not to delete Geoid files unless necessary. Select the file you wish to delete by tapping on it (it will be highlighted in blue when it is selected). Press the Options button and choose Delete.
[wptabtitle] Setting Waypoints[/wptabtitle]
[wptabcontent]
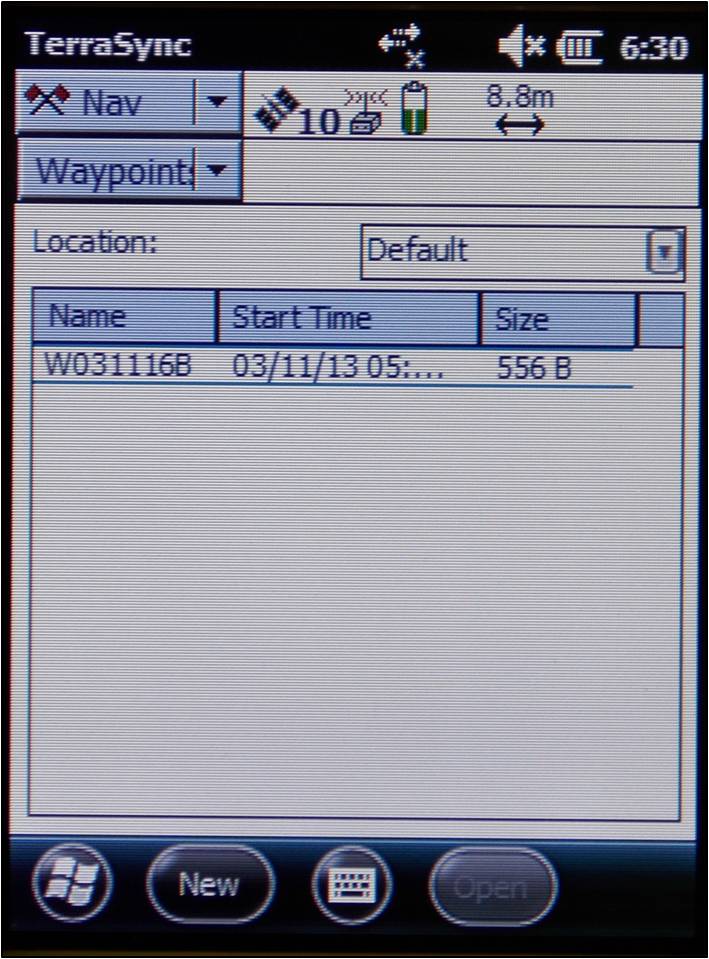
To set waypoints on the receiver, open the Navigate section and Waypoint subsection. Tap the New button at the bottom of the screen (note: if a waypoint file is currently open, you must close it before creating a new file – Options > Close File). Give the file a name (or leave the default name) and tap Done. Expand the Options dropdown menu and choose New.
If you have known coordinates to which you would like to navigate, you may manually enter the coordinates. If you wish to mark a GPS position as a waypoint, expand the Create From dropdown menu and choose GNSS. This option auto-fills the coordinates based on the current GPS position.
[wptabtitle] Navigating to a Waypoint[/wptabtitle]
[wptabcontent]
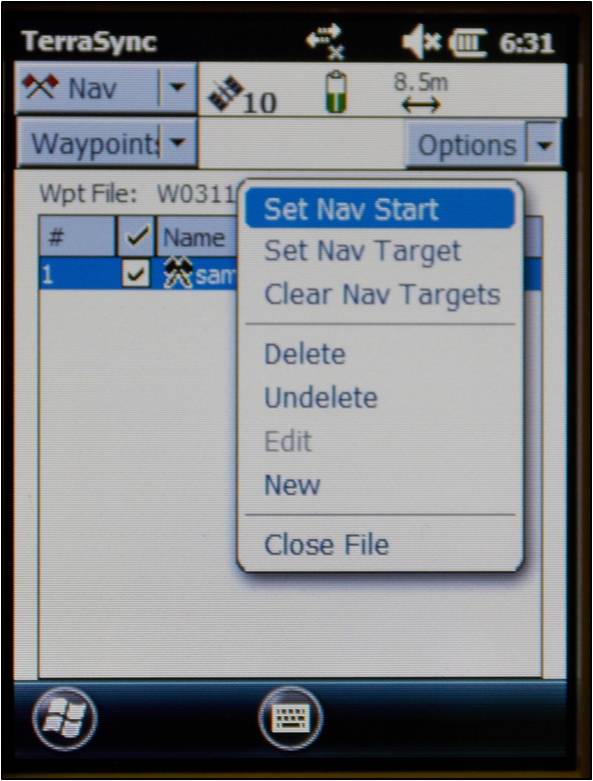
To use the receiver to navigate to an established waypoint, open the Navigate section and Waypoint subsection. Select the waypoint you want to navigate to by tapping the box next to the waypoint (a check will appear in the box). Expand the Options dropdown menu and select Set Nav Target.
Open the Navigate subsection. You should see the name of the waypoint listed at the top of the screen just below the satellite icon. You are now ready to begin navigating. You must start moving in order for the receiver to become oriented in space and give you directions. It doesn’t matter which direction, just start moving. You may adjust the navigation settings by expanding the Options dropdown menu and selecting Navigation Options.
After reaching a waypoint, you may expand the Options dropdown menu while in the Navigate subsection and choose Goto Next Unvisited Waypoint. Alternatively, you may clear the waypoint by opening the Waypoints subsection, expanding the Options dropdown menu and selecting Clear Nav Target. You may then set your next navigation target.
[/wptabs]