There are two main ways to translate DEM data into Unity. One way is to convert a DEM into a Raw heightmap. The other is to convert a GridFloat dem into a Unity terrain
[wptabs mode=”vertical”] [wptabtitle] Using Terragen/3DEM[/wptabtitle] [wptabcontent]The goal of this method is to convert the DEM into a RAW heightmap that Unity reads natively. For many users of Unity, the most cost effective solution is to use a two step rocess using Terragen and 3DEM, but if you can obtain a heightmap from DEM by any other means, you can skip to the Import into Unity section. [/wptabcontent]
[wptabtitle] Convert DEM to Terragen File[/wptabtitle] [wptabcontent]The first step is to convert the DEM into a Terragen file. We use the free program 3DEM, which you can download here.
1. Open 3DEM.
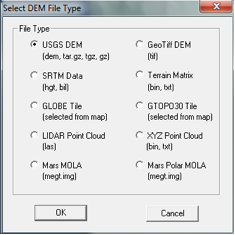
2. Choose the format of the DEM in question
[/wptabcontent]
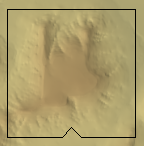
[wptabtitle] Define the export area[/wptabtitle] [wptabcontent]3. Select an area you wish to export.
[wptabtitle] Extract the export extents[/wptabtitle] [wptabcontent]4. Here’s the tricky part. The selection box does not give us any information concerning the width, length and elevation of the selected area and Unity will need this information. We will have to point our cursor in severa spots inside the selection box to extract this data. When you move the cursor, the Northing, Easting and Elevation info appears in the lower right hand corner.
We can use this to extract the width of the selection box. If we point the cursor on the left edge of the box and then the right edge, we subtract the value from each and find the width of the box. Similarly, if we find the lowest elevation and subtract it from the highest elevation, we have our elevation height that Unity will need.
6. File > SaveTerragen Terrain > Selected Area and save it in an accessible area [/wptabcontent]
[wptabtitle] Export from Terragen to RAW[/wptabtitle] [wptabcontent]7. Now open Terragen
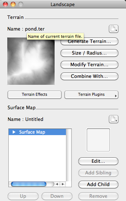
8. Open the .ter file you exported from 3DEM. The area you selected should now appear in the Landscape and the Rendering Control dialog.
9. Go to Export > Terrain > Export Make sure it is 8 bit Raw.
[wptabtitle] Import into Unity[/wptabtitle] [wptabcontent]10. Now open Unity
11. Go to Terrain > Create Terrain. A large terrain will appear in the scene view.
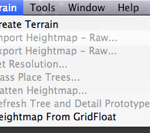
12. Go to Terrain > Import Height – Raw… and select the raw file we exported from Terragen
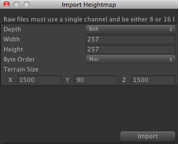
13. The Import Height dialog appears. You’ll need the data we collected from step 4 and enter it into the correct slots. The width and height of the selection box go into the X and Z. The elevation difference goes into Y. Check and make sure the Depth is 8bit, (if you used Terragen) and that the Byte order is your respective OS. Click OK.
[/wptabcontent]
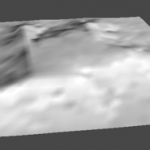
[wptabtitle] The result[/wptabtitle] [wptabcontent]Unity will create the terrain from the DEM. In the scene view, the terrain may appear pixelated with jagged edges, but this is mainly due to the Scene view using LOD to render the terrain. If you drop a First Person Controller onto the terrain and hit play, the terrain will appear smooth.
[/wptabcontent]
[wptabtitle] Using GridFloat format[/wptabtitle] [wptabcontent]If the DEM is in the GridFloat format, then you can enable Unity to read into a Unity terrain. You’ll need to download the script to do this from here. Be sure the header file (HDR) for the GridFloat DEM also resides in the Asset folder.
1. Create a folder in Unity called ‘Editor’
2. Copy the HeightmapFrom GridFloat to the Editor folder.
Placing scripts into an “Editor” folder in Unity actually extends the Unity editor. Now a menu will appear underneath Terrain at the top called ‘Heightmap From GridFloat”
[/wptabcontent]
[wptabtitle]Create the terrain in the scene[/wptabtitle] [wptabcontent]
3. Select the .flt file in the asset folder. (Be sure you have the hdr file as well)
4. Go to Terrain > Heightmap From GridFloat.
The terrain should appear in the scene view.
[/wptabcontent] [/wptabs]
