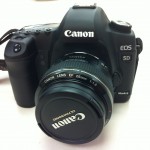
 Download a printable checklist in PDF format here.
– Check that the battery is charged (check spare battery if taking one)
– Copy images from past projects to a laptop if needed and format the card
– Attach the lens you plan to use
– Check the lens for excessive dust
[/wptabcontent]
[wptabtitle] Goals for each image you capture[/wptabtitle] [wptabcontent]
– Use entire frame
– Sharp focus at all distances
– Good exposure throughout image
[/wptabcontent]
[wptabtitle] Camera setup for typical close-range project with DSLR[/wptabtitle] [wptabcontent]
– Set to Aperture Priority mode
– Set aperture to between f8 and f16 (depending on DOF1 needed)
– Set the camera to collect RAW and/or JPEG Large
– Configure other settings as needed
– Mount camera to tripod and frame the object for the first image
– Focus the camera on the object (using auto or manual), then turn the lens to manual focus and tape the focus ring so that it doesn’t move
– If using a zoom lens, tape the zoom so that it doesn’t move
– Set the camera to use a 2 second timer (or use wired shutter release)
– Set camera to use mirror lock-up (to avoid camera vibration)
[/wptabcontent]
[wptabtitle] Notes[/wptabtitle] [wptabcontent]
1 DOF stands for Depth of Field and is a term used to describe the depth of the scene that is in focus. Smaller apertures create more depth of field, though, at some point a small aperture will introduce blur due to diffraction. Learn more here at the dpreview.com glossary.[/wptabcontent] [/wptabs]