This document will guide you through setting up the Konica-Minolta for use with a turntable.
Hint: You can click on any image to see a larger version.
[wptabs style=”wpui-alma” mode=”vertical”] [wptabtitle] TRIPOD & MOUNT [/wptabtitle]
[wptabcontent]
1. Setup the scanner tripod. The tripod doesn’t have to be completely level but you want it to be stable so some degree of leveling is required.
2. Prep the scanner mount by pulling the black lever out, pushing up the gold pin, and then releasing the lever. This widens the slot where the scanner mount rests. 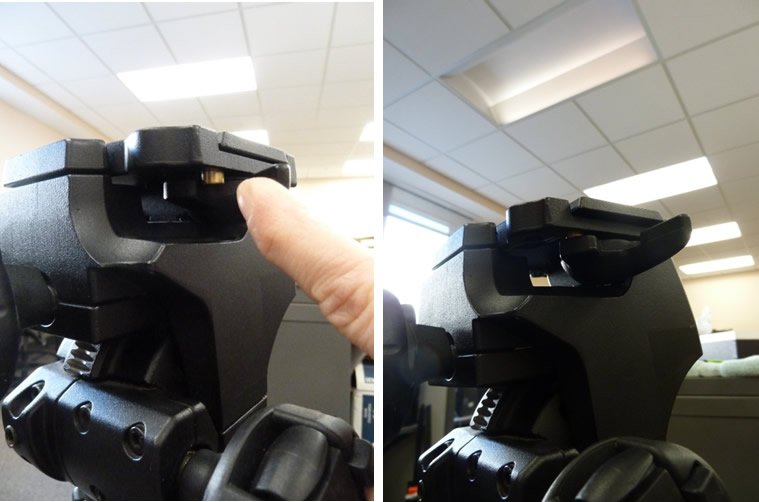
When done correctly, the lever will continue to stick out.
[/wptabcontent]
[wptabtitle] CONNECT SCANNER [/wptabtitle] [wptabcontent]
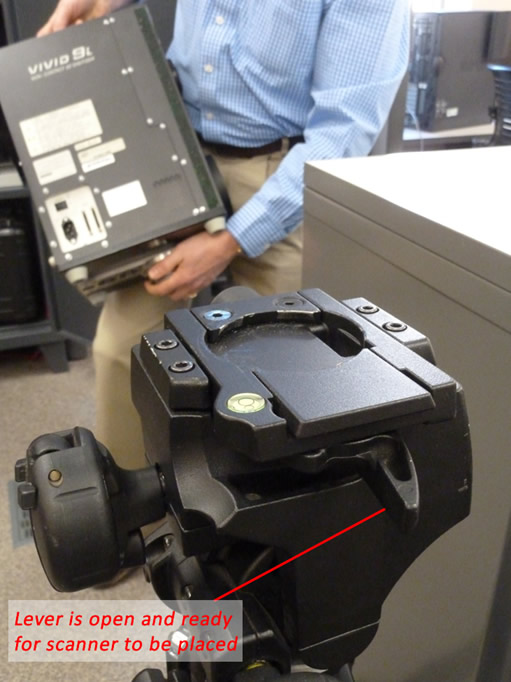
3. Place the scanner on the tripod until it locks into place (you will hear a ‘click’ sound when the mount has locked). Once the scanner has been mounted, ensure that your setup is stable.
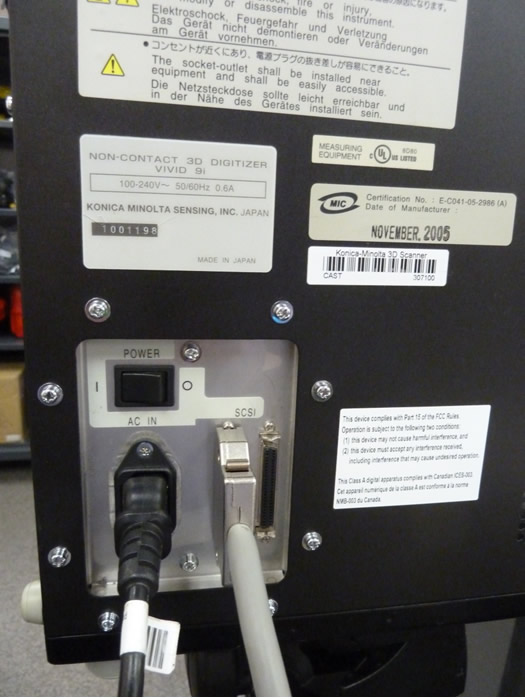
4. Remove the power cable and gray SCSI cable with the PCMCIA card adapter from the small black case. Plug the scanner power cable in and connect the SCSI cable. DO NOT TURN THE SCANNER ON.
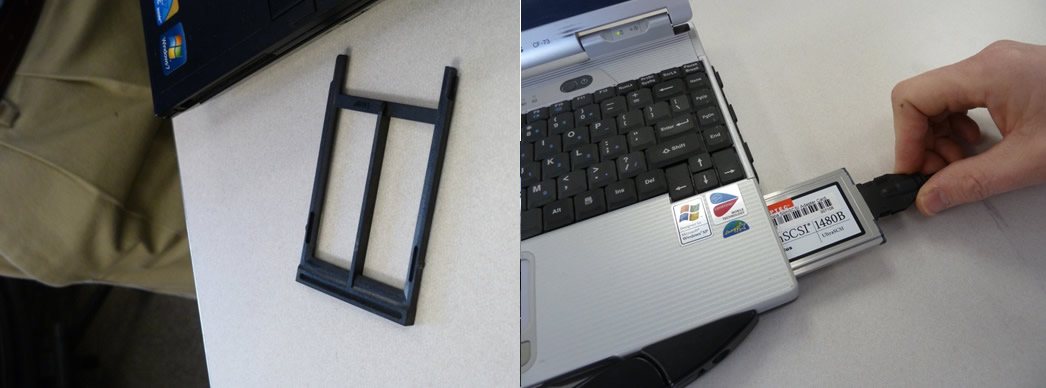
5. Remove the card insert from the PCMCIA slot on the laptop and plug the PCMCIA card into the laptop.
[/wptabcontent]
[wptabtitle] SETUP TURNTABLE [/wptabtitle] [wptabcontent]
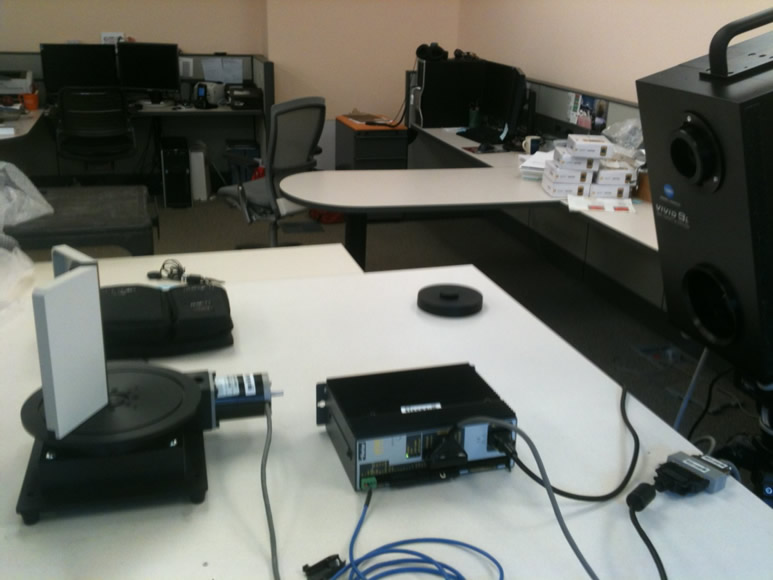
6. Remove the turntable, black power box, and all cables from the black case. Set the two, black and white calibration charts to the side for now. Place the turntable approximately 1 meter (or slightly less) from the scanner with the corded end facing towards the front i.e. towards the scanner. The suggested scan range for the tele and mid lenses is .6 to 1 meter. When you begin scanning, the distance parameter will be displayed in the scan window. We generally suggest to keep the distance in the range of 700-800 mm to avoid data loss that can occur when an object is either too close or too far from the scanner.
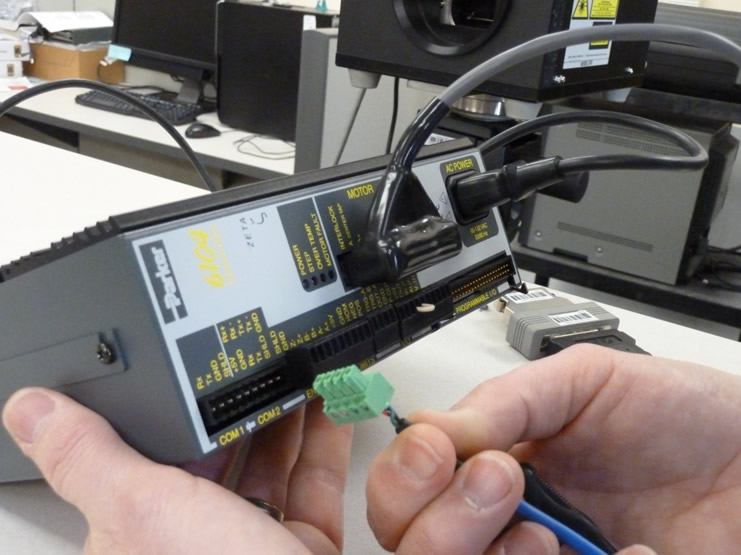
7. Plug the gray cable from turntable into the black power box; also plug the power cable into the black power box. Next, take the blue serial cable and plug the green end (with 4 prongs) into the COM1 port on the black box. NOTE: Theprongs on the green end are directional and will face down.
[/wptabcontent]
[wptabtitle] CONNECT LAPTOP [/wptabtitle] [wptabcontent]
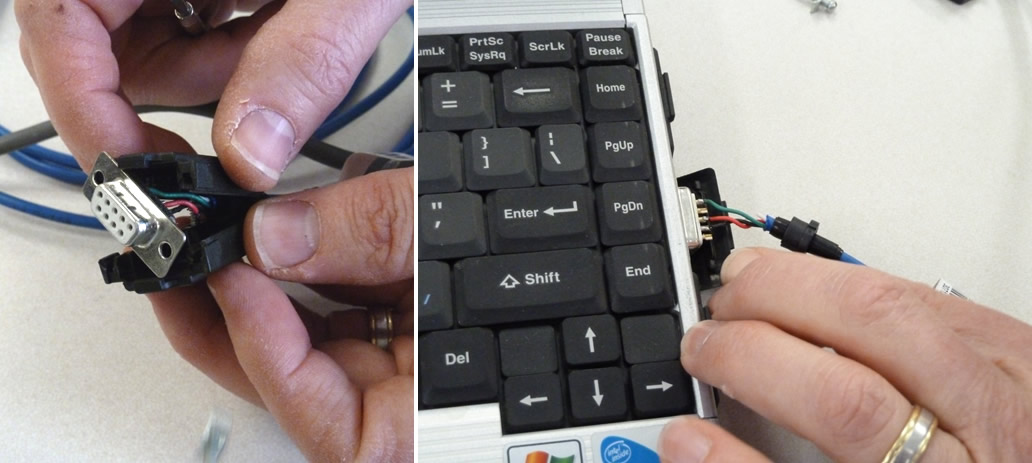
8. Next, take the other end of the serial cable and plug it into the serial connection on the laptop. To work with a laptop, you will probably have to remove the black case around the plug end using a small screwdriver.
[/wptabcontent]
[wptabtitle] POWER UP SCANNER [/wptabtitle] [wptabcontent]
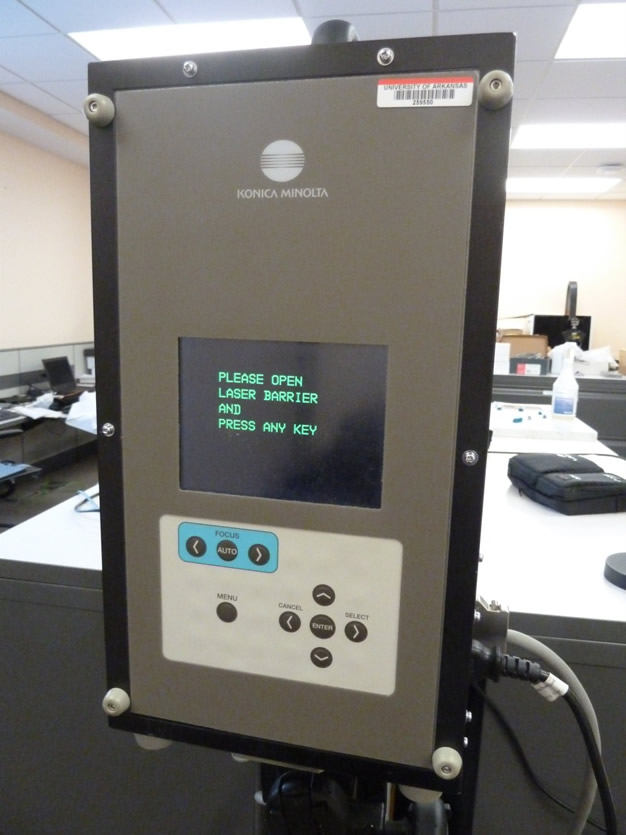
9. Once everything has been plugged in and you have the desired lens in place (see the Changing Lenses section in the final slides of this post if you need to change the scanner lens). Next power on the scanner. It will take a minute to load, when it is complete, it will display the following message on screen “Please open laser barrier and press any key.”
10. Next, pull the large round cap off of the front of the scanner (bottom) and remove the lens cap (top), and then press any button on the back of the scanner to continue.

[/wptabcontent]
[wptabtitle] OPEN POLYWORKS [/wptabtitle] [wptabcontent]
11. Next power on the laptop and log on. Note: It is important to power the scanner first and then the laptop so the connection is established.
12. Once everything has been turned on, open Polyworks on the laptop. Once the Polyworks Workspace Manager opens, open the IMAlign Module. Next, go to Scanners menu, and select Minolta – VIVID 9i. In the window that comes up, you should see a live camera view from the scanner (connection successful – hooray.) You are now ready to continue to the Konica-Minota Vivid 9i – Scan Settings post.
[/wptabcontent]
[wptabtitle] VIVID 9i LENSES [/wptabtitle] [wptabcontent]
Changing the Lenses on the VIVID 9i
The VIVID 9i comes with a set of three interchangeable lenses: tele, middle, and wide. The scanner’s camera array is fixed 640X480 pixels. Each lens offers a different field of view with the tele being the smallest. The FOV for each lens is provided below.

The tele lens offers the best resolution and is ideal for scanning objects smaller than a baseball or larger objects with a higher resolution. The mid lens works well for objects that are basketball size and was the lens predominantly used for scanning pottery vessels in the Virtual Hampson Museum project. CAST researchers generally do not recommend use of the wide angle lens.
[/wptabcontent]
[wptabtitle] CHANGING LENSES I [/wptabtitle] [wptabcontent]
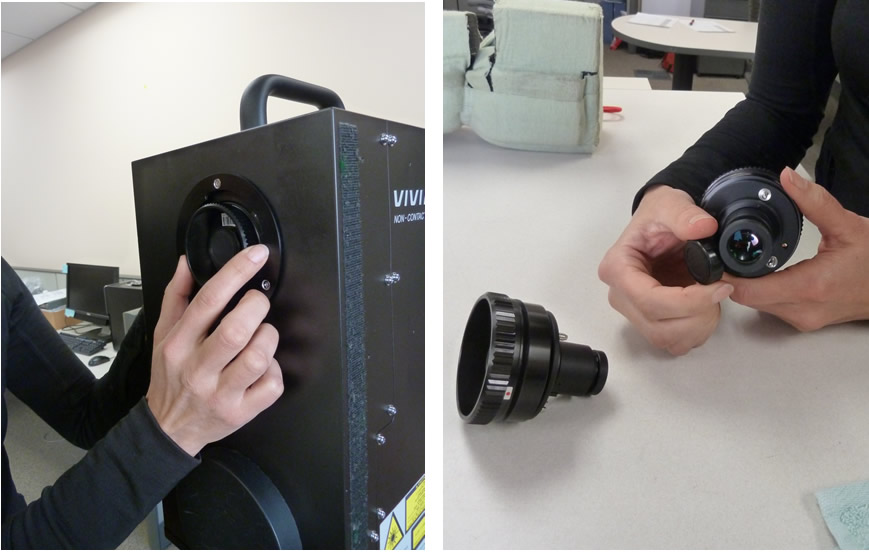
A. To change the lens on the VIVID 9i, first make sure the scanner is turned off.
B. Next remove the lens that you wish to use from the lens box and its plastic bag.
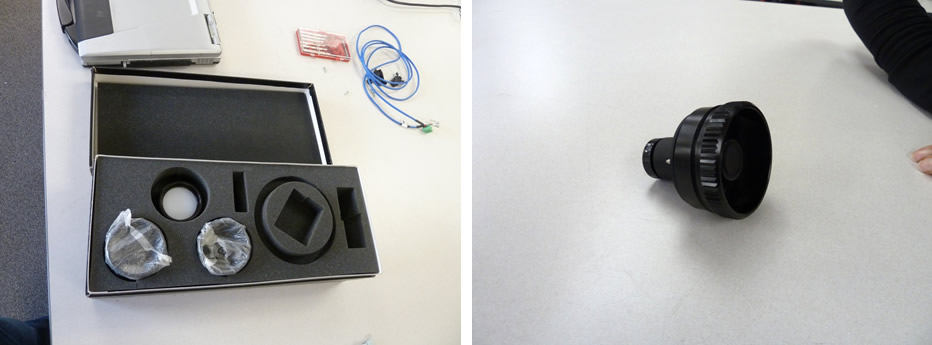
C. Next remove the lens protector and unscrew the lens that is currently on the scanner. IMMEDIATELY place the lens cap (located on the lens box) on the back of the lens.
NOTE: Every lens should always have 2 lens caps (one of the front and back of the lens) when the lens is not in use or is being stored.
[/wptabcontent]
[wptabtitle] CHANGING LENSES II [/wptabtitle] [wptabcontent]
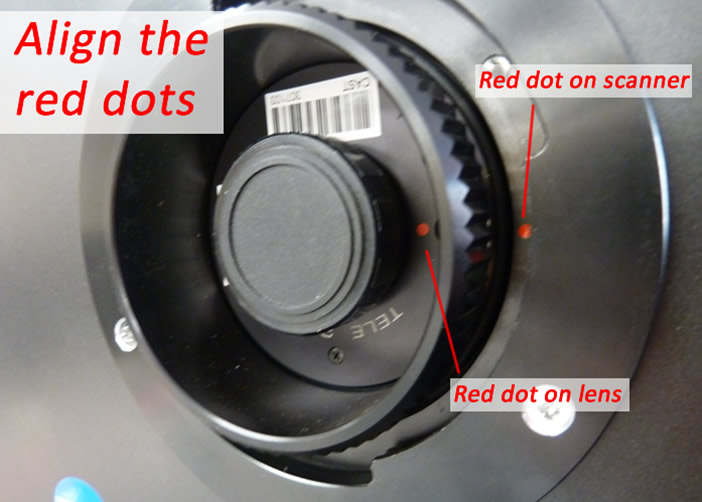
D. Remove the back lens cap from the desired lens and screw the new lens into the scanner by first lining up the red dots found on both the lens and the scanner.
E. Replace the black lens protector on the scanner. Replace both lens caps on the newly removed lens, place in a plastic bag, and store in the lens box.
F. You are ready to begin scanning. Power on the scanner and continue with Step 9 on the ‘Power up Scanner’ Slide above.
[/wptabcontent]
[wptabtitle] CONTINUE TO… [/wptabtitle] [wptabcontent]
Continue to Konica-Minota Vivid 9i – Scan Settings.
[/wptabcontent]
[/wptabs]