This workflow will show you how set up the Leica C10 Laser Scanner prior to beginning your scanning project.
Hint: You can click on any image to see a larger version.
[wptabs style=”wpui-alma” mode=”vertical”]
[wptabtitle] INSTRUMENT’S COMPONENTS[/wptabtitle]
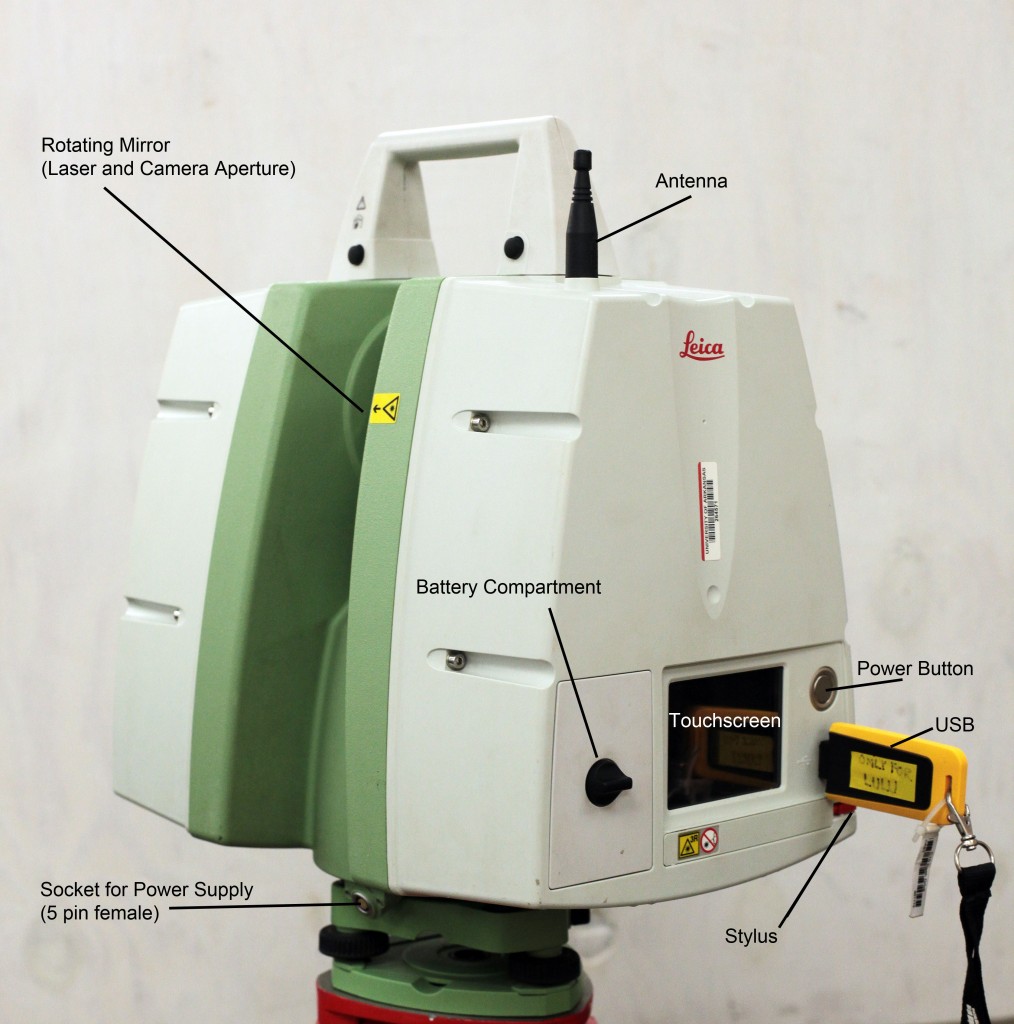
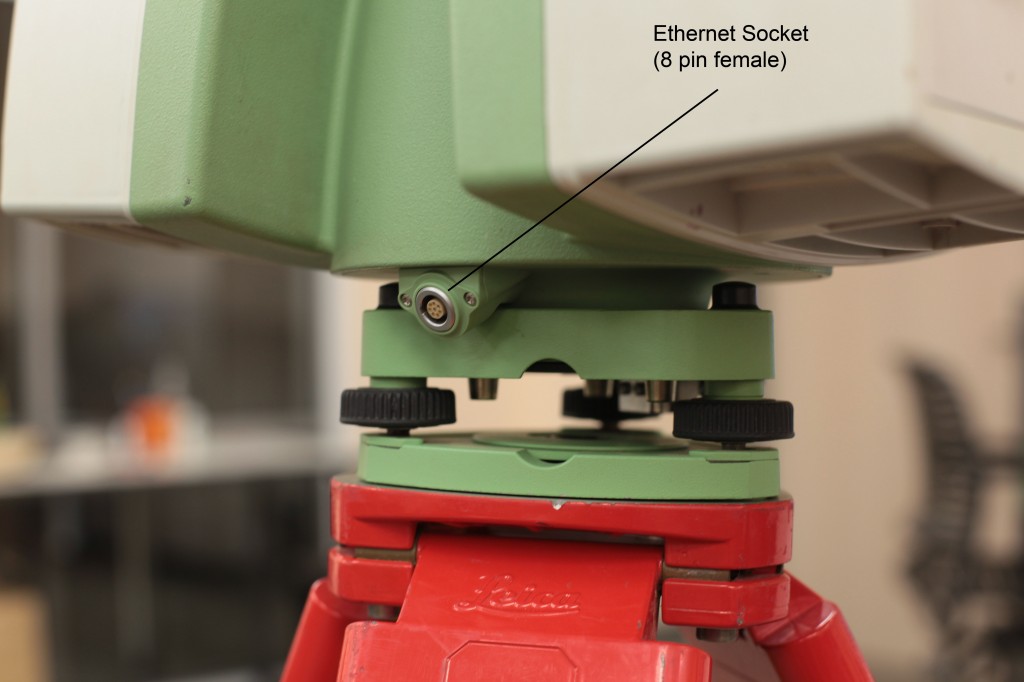
[wptabcontent]


[/wptabcontent]
[wptabtitle] SUGGESTED EQUIPMENT CHECKLIST[/wptabtitle]
[wptabcontent]
- Scanner and equipment as listed above
- Tripod
- Batteries: taking 4-6 fully-charged batteries is usually appropriate for a day’s scanning while external chargers and/or extension cords are suggested for longer projects. Ensure that batteries are fully charged and healthy the day before the project begins.
- Targets and Target numbers if applicable
- USB stick (that is updated and cleaned of any infections/problems) if scanning onboard
- Laptop (with updated virus protection and adequate free space), Ethernet cable, external laptop battery, and mouse if scanning to the computer or processing data
[/wptabcontent]
[wptabtitle] PRE-SCANNING CHECK[/wptabtitle]
[wptabcontent]
- Do not scan in rain, snow or fog
- Protect scanner from excess moisture and rain
- If temperatures are outside the calibrated range, an error message will display. Measuring accuracy cannot be specified if scanning proceeds
- If the scanner is taken from a cold environment into a warm, humid one, the glass window and even the optic can fog up causing measurement error as does dust, and fingerprints
- Always check to verify that the lens is perfectly clean.
[/wptabcontent]
[wptabtitle] C10 SCANNER SETUP[/wptabtitle]
[wptabcontent]
- Set up tripod as stable and level as possible – Never use the scanner without the tripod
- Remove instrument from case with both hands, grasping the top with one hand on the handle and reaching under the base with the other in the space provided. Refrain from using the tribrach (base mount) to lift with as it can turn unexpectedly
- Place instrument on tripod and secure – Always keep one hand on the handle until the scanner is firmly attached to the tripod
- Level using the leveling screws and built-in bubble level
[/wptabcontent]
[wptabtitle] MEASURE INSTRUMENT HEIGHT[/wptabtitle]
[wptabcontent]
To get an accurate height measurement use the GHM008 instrument height meter in conjunction with the GHT196 distance holder which are both included with the scanner.
- Place tripod centrally over the ground point, level instrument.
- Click GHT196 distance holder to tribrach. It must “snap” onto the cover over an adjusting screw.
- Unfold measuring tongue, pull out tape measure a little.
- Insert GHM008 instrument height meter in the distance holder and attach.
- Swivel measure in the direction of the ground point, pull out until the tip of the measuring tongue touches the point on the ground, keep under tension and do not allow to sag, clamp if necessary.
- Read height of the instrument (ground – tilt axis) in the reading window at the red marking (in the example 1.627 m).
[/wptabcontent]
[wptabtitle] SCANNING WITHOUT A COMPUTER / ‘ONBOARD'[/wptabtitle] [wptabcontent]
- Position the scanner in the center of the target field
- Level the scanner using the physical bubble
- Turn on the instrument by pressing the ‘Big silver button’ once
- The scanner will boot in ~90 seconds.
[/wptabcontent]
[wptabtitle] ONCE BOOTED YOU WILL SEE THIS SCREEN…[/wptabtitle] [wptabcontent]
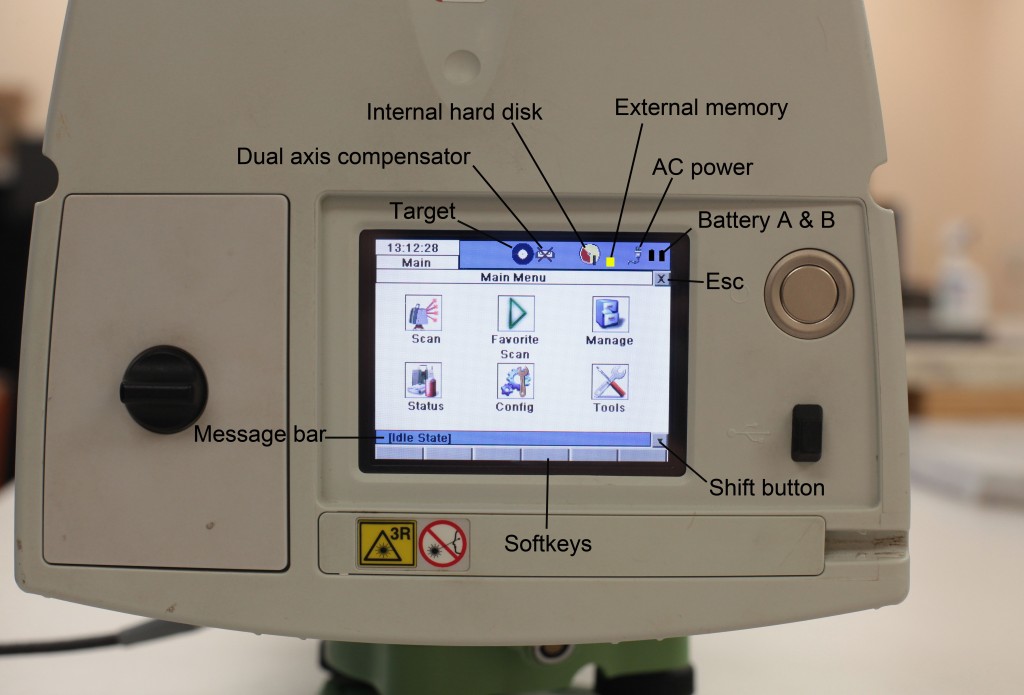
[Idle State] should be displayed in command line
Click ‘Level & Ls Plummet’[/wptabcontent]
[wptabtitle] LEVEL THE SCANNER[/wptabtitle]
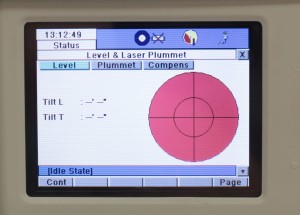
[wptabcontent]First level the scanner using the physical bubble. Then try to level the scanner as best as possible using the digital bubble.

Within the ‘Plummet’ menu you can turn the laser plummet on or off
Within the ‘Compensator’ menu ensure the compensator is turned on. Return to the main menu by pressing the ‘x’ in the top right corner. (At this time you can remove the standard handle if data collected above the scanner is important to the project).[/wptabcontent]
[wptabtitle] CONTINUE TO…[/wptabtitle]
[wptabcontent]Continue to part 2 of the series, Leica C10: Starting a New Project [/wptabcontent][/wptabs]
