[wptabs mode=”vertical”]
[wptabtitle] Importing Data[/wptabtitle]
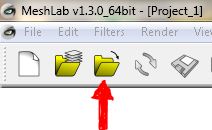
[wptabcontent] Once MeshLab is open the “Import Mesh” icon on the main toolbar will allow you to navigate to the files you have stored.
**MeshLab can import the following file types:
PLY, STL, OFF, OBJ, 3DS, COLLADA(dae), PTX, V3D, PTS, APTS, XYZ, GTS, TRI, ASC, X3D, X3DV, VRML, ALN[/wptabcontent]
[wptabtitle] Subsampling[/wptabtitle]
[wptabcontent]Occasionally you will need to sub-sample your point-cloud data to make it easier to work with. This does inevitably reduce the resolution of the data but if proper techniques are used you can maintain a high level of fidelity in the point cloud data.
*** Especially in noisy scan’s from the Kinect
We will want to recreate a surface, which through trial and error (at least with objects that contain a lot of curves or contours) the Poisson disk method obtains the best results.
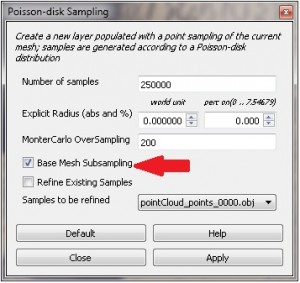
The “Filter->Sampling->Poisson Disk Sampling”
Make sure you check the “Base Mesh Subsampling” box.
The algotrithim it was designed to create circular window over the point cloud and calculate those points that are statistically “random” according to a Poisson distribution.
Like previously mentioned the exact parameters used in your process are TOTALLY APPLICATION DEPENDENT. Meaning that what worked well with a point cloud of a million points for the interior of a room, may not work with a million points of a human face.
[/wptabcontent]
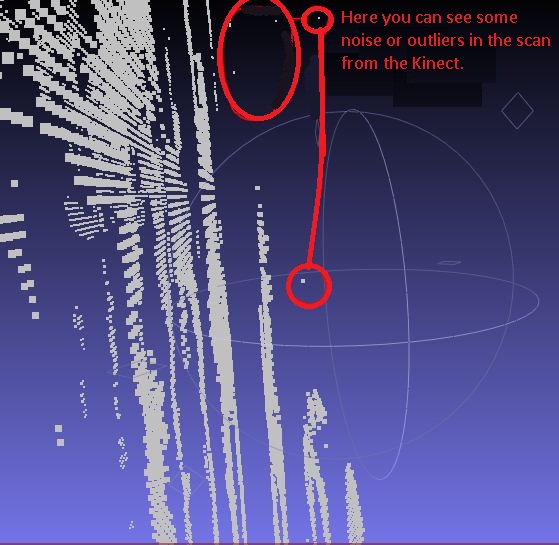
[wptabtitle] More on Subsampling[/wptabtitle] [wptabcontent]The image below the point cloud captured from the Microsoft Kinect (of a human chest – side view) and it has points that are not apart of the actual object we want to creat a 3D model of. So to avoid have spikes or deformities in our data we should apply a few methods in eliminating them when possible.
While there are many different ways to deal with these rouge points we can once again apply the Poisson distribution, which seems to have the best results in the automated filters offered by MeshLab.
Much like the filtering of noise in LiDAR data the Poisson takes the entire area of interest(the radius of the window size we specify in this case) and looks at the corresponding distribution of points in 3D space. When points are determined to be statistically random following the number of iterations you specify the alogritim will remove that point from the recreation of the surface.
Even though the Poisson does an excellent job there are still cases where manually cleaning these points from the data is required. (Meaning select it and delete it)
It is also important to note that since the Poisson is a stochastic process no two subsamples will be exactly the same even if the exact same parameters are used. So save your data often!!
[/wptabcontent]
[wptabtitle] Reconstructing the Normals[/wptabtitle]
[wptabcontent]
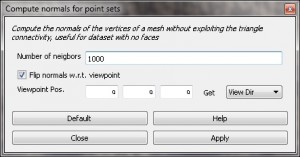
We will now have to calculate the normals on the sub-sample we just created so MeshLab knows which side of the point is facing “out” and which is “in”.
For the point set:
“Filters -> Point Set -> Compute Normals for point set”
[/wptabcontent]
[wptabtitle] Reconstructing the Surface (Creating the Mesh)[/wptabtitle]
[wptabcontent]At this point you will need to choose one of the surface reconstruction algorithms that MeshLab offers.
The “Filters -> Point Set-> Surface Reconstruction: Poisson”
*** Note: This could get time consuming and at least in my experience crashes when the data is huge(“huge” is a scientific word for bigger than normal)
As mentioned before in the subsampling discussion a few tabs ago you can also use the “Marching Cubes (APSS)” which has pretty good results on data with few contours.
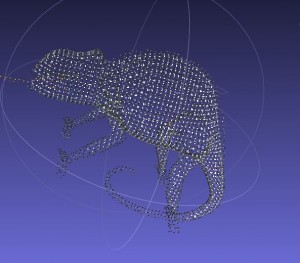
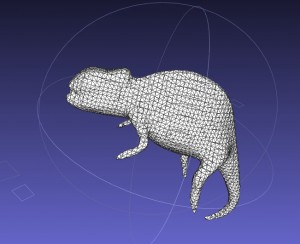
For you inquisitive folks who need to know more about each of these processes for surface reconstruction please check out these two links: Marching Cubes or the Poisson
[/wptabcontent]
[wptabtitle] The Next Steps in MeshLab[/wptabtitle]
[wptabcontent]So now that you have created a “mesh” you can use the rest of the many wonderful tools MeshLab has to offer.
Unlike other programs that are specifically inclined to working with the point set data, MeshLab as the name eludes prefers to use meshes. Therefore, if you need to fill any holes where there is missing data, add texture information, or take measurements ….etc.; you need to use a mesh. Which of course I hope this little tutorial should you how to do.
Stay tuned for more demo’s using MeshLab.

[/wptabcontent]
[/wptabs]
