[wptabtitle] DOWNLOAD[/wptabtitle] [wptabcontent]1. Download Leica’s FREE TruView Internet Explorer Plug-in here.
NOTE: You are able to use TruView once without the plug-in; The plug-in is for Windows Internet Explorer only.
2. Open a TruView Site Map in Internet Explorer. Here is an example Site Map from the University of Arkansas Chilling and Heating Plants. And here is an example Site Map from the University’s Vol Walker Hall.[/wptabcontent]
3. The site map opens with each of the scanner locations marked with a yellow triangle and the name of the scan > These icons are hyperlinks into the TruView space where you have a view from the scanner’s location. You will see exactly what the scanner saw from that location, and depending on settings, the other scanner locations may be visible; if an error appears, confirm that you are using Internet Explorer
Figure 1 – Hyperlink that allows you to enter viewpoint of the scanner position from the TruView site map. The number represents the scanner station identification.
4. Left Click in the center of the icon to open the TruView Space
[wptabtitle] USING TRUVIEW[/wptabtitle] [wptabcontent]5. Once in the TruView Space, navigate, take measurements, and move between scanner locations as wanted.
Basic Navigation: PAN = Left Mouse + Drag, ZOOM = Roll Middle Mouse.
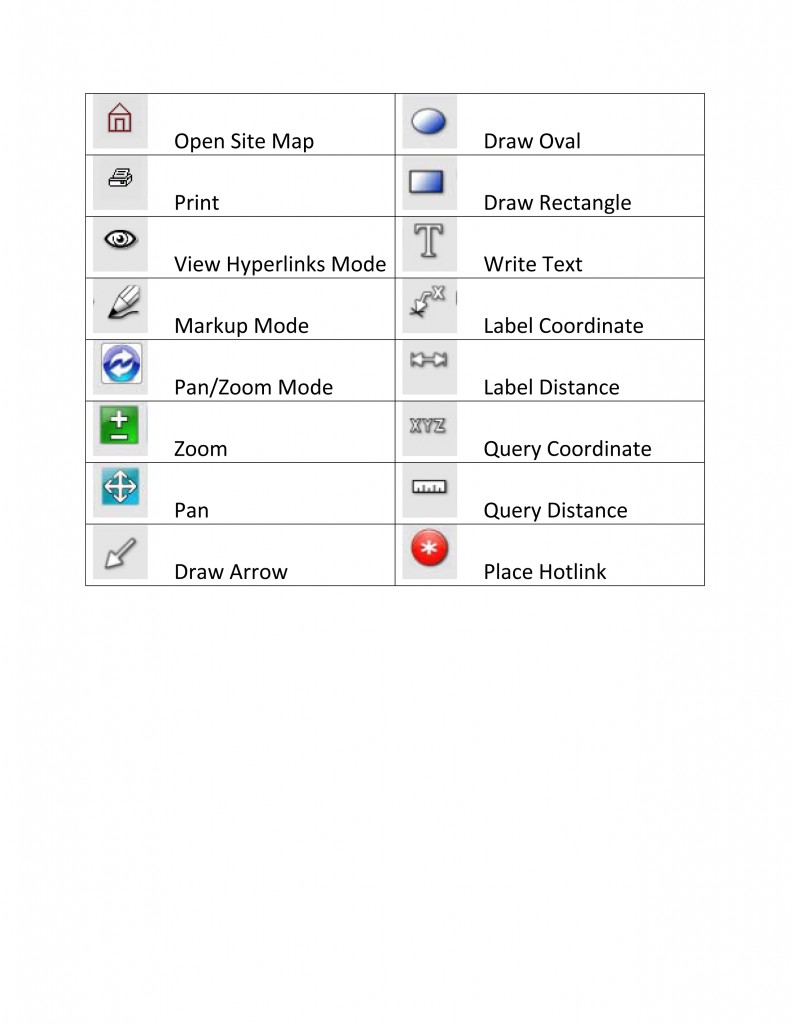
Also see the information tabs on the left and the tool icons:
Measure Tab – shows the properties of measurements taken and allows the user to set the units; This is also where the user adjusts the visibility of other scan locations (ie: Neighbor TruViews) and the visibility of the point cloud based on range or altitude (when these fields are not checked, the full range and altitude is displayed)
Markup Tab – displays the information about the user’s markups and allows markup.xml files to be imported and exported
View Tab – Allows the user to create and save specific views Toolbar Icons:
[/wptabcontent]
[wptabtitle] TRUVIEW ICONS[/wptabtitle] [wptabcontent]6. TruView Icons
[/wptabcontent]