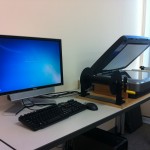
This document will guide you through using the Epson 10000XL Flatbed Scanner to scan photographs and other media for many applications including use in photogrammetry and archival storage.
Hint: You can click on any image to see a larger version.
[wptabs style=”wpui-alma” mode=”vertical”] [wptabtitle] GETTING STARTED [/wptabtitle]
[wptabcontent]
A current version of EPSON Scan Utility software can be freely downloaded from the Epson website and used to scan a variety of media, including transparent film and photographic prints.
To get started, make sure the scanner is connected to the computer and turn both the scanner and computer on. Log in to the computer and start the EPSON Scan software.
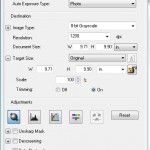
1. Mode – In the EPSON Scan dialog (Figure 1), change the “Mode” to “Professional Mode.”
2. Media – If scanning transparent film media, choose “Film” in the “Document Type” drop-down menu. If scanning paper, prints, or other reflective type media choose “Reflective.”
[/wptabcontent]
[wptabtitle] SETTINGS [/wptabtitle] [wptabcontent]
3. The “Document Source” should always be set to “Document Table.”
4. In the “Image Type” drop-down menu, choose the appropriate setting for the media you’re scanning.
-When scanning transparent film media we recommend using a 16-bit Grayscale (for B&W film) or 24-bit Color (for color natural or false color film).
5. Choose a resolution that is appropriate for the media you’re scanning.
– When scanning transparent film media we recommend using a minimum resolution of 1200 dpi
– For high quality film, we recommend using 2400 or 3200 dpi in order to capture all of the available detail contained within the film
– When scanning print or paper media, a scanning resolution of 300-350 dpi should capture all of the available detail contained within the print.
6. Un-check the “Thumbnail” check box. All other settings in the EPSON Scan dialog will depend on the media you’re scanning, or on your personal preference.
[/wptabcontent]
[wptabtitle] SCANNING [/wptabtitle] [wptabcontent]
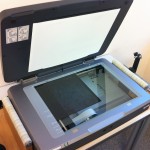
7. Placement – Carefully place the media face down in the upper left corner of the scan bed (Figure 2). We recommend using clean gloves when handling transparent film or print media.
8. Click the “Preview” button at the bottom of the dialog and the scanner will begin scanning.
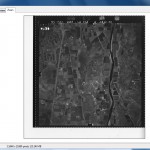
9. Once the preview scan is complete, the “Preview” dialog should appear (Figure 3). Use the Marquee tools to select the area of the media you would like to include in your scan. Be sure not to crop an image you plan on using for photogrammetry, and to include any visible fiducial marks.
10. Begin Scan – In the “EPSON Scan” dialog window, click “Scan” to start the scanning process.
[/wptabcontent]
[wptabtitle] SAVING YOUR FILE [/wptabtitle] [wptabcontent]
11. In the “File Save Settings” dialog, choose a location, format, and name for output file.
NOTE: For best practice (and especially projects considering archival), we recommend scanning to the TIFF (.tif) file format.
12. Time – Depending on the size of your media and the resolution you chose, the scanning process could take up to 1-2 hours.
[/wptabcontent]
[/wptabs]


