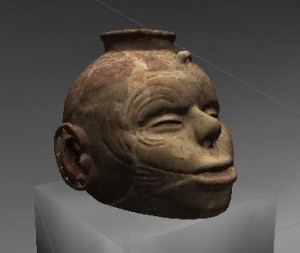
This series of posts will teach you how to navigate in Unity and to create a basic virtual museum.
Hint: You can click on any image to see a larger version.
[wptabs mode=”vertical”]
[wptabtitle] Intro[/wptabtitle] [wptabcontent]This chapter will show you how to put together a walkable demo of a simple museum using several models. The techniques in this tutorial can be applied in many ways. Although I use models from the Virtual Hampson museum as examples, you are welcome to use your own.
You will need to download the following model, or use one of your own:
https://dl.dropbox.com/u/22781413/museumdemo/simpleMuseum.zip
You can take a look at the final product here.
[/wptabcontent]
[wptabtitle] Create a new project[/wptabtitle] [wptabcontent]
Open Unity and go to File > New Project.
The New Project file dialog will come up.
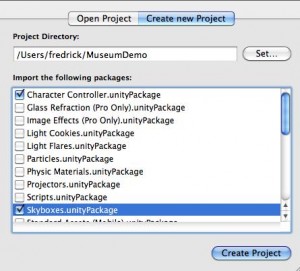
Name the project “Museum Demo” and save it in a convenient location.
Below you will see the packages Unity comes with. A package is a set of scripts and assets that allow certain functionalities. For this demo, we will choose:
– CharacterController
– Skybox
Unity will open with an empty scene.
[/wptabcontent]
[wptabtitle] Import the model[/wptabtitle] [wptabcontent]Now we’ll import the simpleMuseum model. Either we can copy and paste the file into the asset folder using Explorer or we can drag and drop the file into the Project panel.

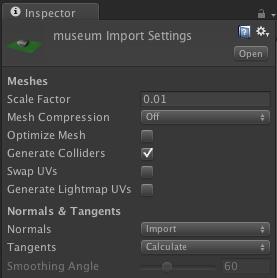
Click on the model in the Project panel, and its Import Settings will show up in the Inspector. You’ll want to do two things here.
1.Check the Generate Colliders box.
2. Adjust the scale factor. Every modeling application processes units differently. (For the simpleMuseum model, try a scale factor of .01 ).
[/wptabcontent]
[wptabtitle] Scene View[/wptabtitle] [wptabcontent]
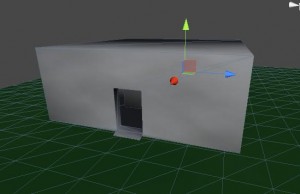
Now we’ll drag and drop the model from the Project panel to the Scene view.
 [/wptabcontent]
[wptabtitle] The First Person Controller[/wptabtitle] [wptabcontent]
It’s hard to see if the scale is off without another model for comparison so we’ll also drag and drop the First Person Controller into the scene.
You can find the First Person Controller* (FPC) by locating the Standard Assets folder in the Project panel and looking in the Character Controllers folder. You will see the 3rd Person Controller and the FPC .

NB: If you do not find the FPC, go to Asset > Import Package > Character Controllers and Import All.
Drag the (FPC) into the scene inside the museum model.
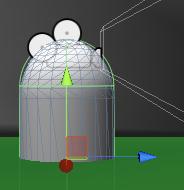
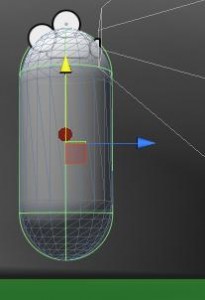
FPC is raised off the floor. If the FPC is partially through floor, the camera will fall to infinity. If the FPC is high above the green plane, it will fall until it collides with it.
 [/wptabcontent]
[wptabtitle] FPC and model scale[/wptabtitle] [wptabcontent]The FPC is 2 units tall. Unity works best thinking the units in meters, but it mainly depends on the units used in the modeling application. If the model is larger or smaller relative to the FPC, you can adjust the Scale Factor accordingly. 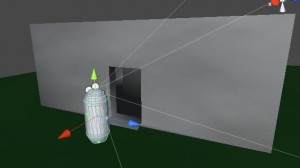 [/wptabcontent]
[wptabtitle] Preview the Model[/wptabtitle] [wptabcontent]Press the Play button at the top. This will compile the scripts and show you a preview. You can walk around using the arrow keys or WASD. You can look around using mouse movement. You can even jump with space bar. We’ll adjust these controls later.
![]()
If the camera falls through the model, either the FPC wasn’t raised enough off the floor or “Generate Colliders” wasn’t checked in the Import Settings. [/wptabcontent]
[wptabtitle] Scene Lighting[/wptabtitle] [wptabcontent]Likely, the preview will be dark and difficult to see clearly. Let’s add a light to the scene.

Unity provides three types of lighting typical for 3D applications: Spot, Directional, Point.
Point light is an omnidirectional point of light. Directional light imitates sun light from an angle. Spot light is a concentrated area light. To light an entire scene, we will add a directional light.
Click on GameObject > Create Other > Directional Light. [/wptabcontent]
[wptabtitle] Edit Unity Lighting[/wptabtitle] [wptabcontent]
Press E to go into rotate mode and rotate the light to obtain the desired lighting. The position of the light is irrelevant. You can change the color and intensity in the inspector while you have the Directional Light selected.

[/wptabcontent]
[wptabtitle] Invisible Colliders[/wptabtitle] [wptabcontent]Sometimes it’s convenient to be able to tightly control where users have access to. An easy solution for blocking user access is to place invisible colliders around the prohibited space.
You’ll definitely want to block access anywhere the user may fall infinity and break the user experience as in our current museum demo.
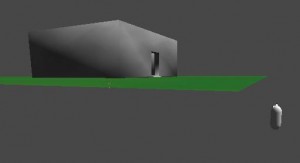
Adding invisible collider is very simple. We’ll start by adding a cube to the scene.
1.Go to GameObject > Create Other > Cube
2. Press ‘F” to focus on the cube
A cube appears in the scene view.
[/wptabcontent]
[wptabtitle] Moving the Cube 1[/wptabtitle] [wptabcontent]
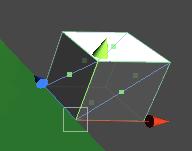
We’ll move the cube to the edge of the green plane. We’ll use vertex snapping for moving objects next to other objects.
1. With the cube still selected, holding down ‘V’, a square gizmo will appear over the nearest vertex.

2. With ‘V’ still held down over the desired vertex, click LMB and the cube will snap to the nearest vertex of another object. Drag the cube so that it lines up next to the edge of the green plane.
 [/wptabcontent]
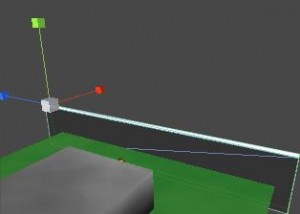
[wptabtitle] Scaling the Cube[/wptabtitle] [wptabcontent]3. Now press ‘R’ to go into scale mode and scale the cube along the X axis(blue handle) along the full width of the green plane. Then scale the cube of the Y axis (green handle) so that the cube is taller than the FPC.
[/wptabcontent]
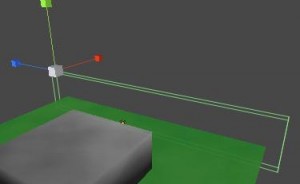
[wptabtitle] Hide the Cube[/wptabtitle] [wptabcontent]4. Finally, with the cube still selected, go to the Inspector and uncheck the box next to MeshRenderer.
 This will render the cube invisible, but the collider will still be in effect.
[/wptabcontent]
[wptabtitle] Skybox Creation[/wptabtitle] [wptabcontent]
Now we can duplicate the object (Ctrl D) and reposition the duplicates adjacent to the other edges of the green plane.
Unity provides a number of skyboxes you can use. If you did not import the Skybox package when you created the project, you can import to Assets > Import Packages > Skyboxes, then click the Import button on the popup window.
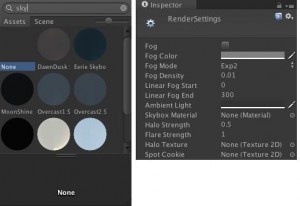
Now go to Edit > Render Settings and in the inspector you’ll find Skybox Material.
Click on the little circle next to it and you’ll open the Material Browser. Unfortunately, it will show every Material existing in the project and will not cull out those only suitable for Skyboxes. But since Skybox materials usually have “sky” in the name, if you type “sky” in the search bar at the top, the browser will only show those materials suitable for Skyboxes. Unity provides various day and night time skyboxes.
[/wptabcontent]
[wptabtitle] Motion Adjustment[/wptabtitle] [wptabcontent]Most likely you will want to fine tune the motion controls and interactive experience of your walkthrough model. We’ll take a look at adjusting the speed of your movement, sensitivity of the mouse and look brief at how we can modify the scripts Unity comes with. [/wptabcontent]
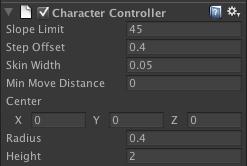
[wptabtitle] Character Controller Menu[/wptabtitle] [wptabcontent]Select the FPC and you will see in the inspector how the FPC is constructed from individual components.
The Character Controller allows you to adjust the width and height of the FPC among other things.
 [/wptabcontent]
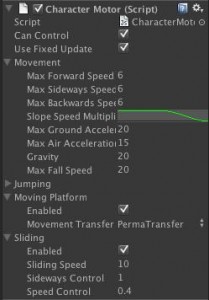
[wptabtitle] The Character Motor Component[/wptabtitle] [wptabcontent]The Character Motor component allows you to adjust movement speed.
-Expand the Movement hierarchy and you’ll find the Max Forward, Sideways and Backwards Speed, as well as Gravity and Ground Acceleration.
-The most effective strategy for fine tuning is to be in Play Mode and adjust the values. Anytime you adjust a value it will be reflected in the Player. Once you have values that seem appropriate, either take a snapshot of the values or write them down. When you quit Play Mode, the values will reset to their original, and you must enter them in again.
You can also adjust the Jumping or disable it completely. It is unlikely you will need to worry about Moving Platform and Sliding.
[/wptabcontent]
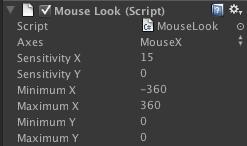
[wptabtitle] Mouse Sensitivity[/wptabtitle] [wptabcontent]Looking around with the mouse may seem jarring or disorienting, but you can tweak these values so you can have a smooth experience. But we will have to look in two different locations. Unity handles X and Y rotation differently for the FPC. To adjust the mouse sensitivity in the X axis, with the FPC selected, look at the Inspector and find the Mouse Look component. MouseX should be selected in the Axes. Adjusting the Sensitivity X will adjust the mouse sensitivity in the X axes. Adjusting the Y will have no effect.
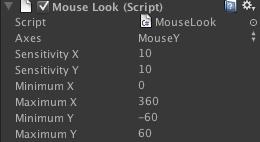
To modify the Y Sensitivy, select the FPC in the Hierarchy and expand it. You will find Graphics and Main Camera. Select main Camera and you the inspector will show another Mouse Look component. Adjusting the Sensitivity Y will modify your mouse movements up and down.
You can also decide how far the user can look up and down by adjusting the Minimum Y and Maximum Y values
 [/wptabcontent]
[wptabtitle] Continue…[/wptabtitle] [wptabcontent]
These are the basics for a walkable demo in Unity. We will next look at adding a mechanism for gathering information in our walkable demo.
Extra:
A museum should have artifacts! Download several Hampson artifacts, import them and place them on the pedestals inside the museum structure. You can use them in the next tutorial. Be sure to use a scale factor of .005. Leave the Generate Colliders box unchecked.
Continue here…
[/wptabcontent] [/wptabs]
