This series of posts will teach you how to navigate in Unity and to create a basic virtual museum.
Hint: You can click on any image to see a larger version.
[wptabs mode=”vertical”] [wptabtitle] The interface[/wptabtitle] [wptabcontent]
The Unity interface can be daunting on first glance. But, for getting started, we can break it down into four sections.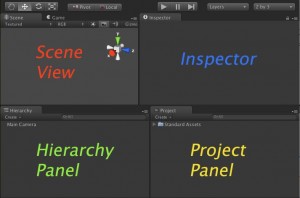 [/wptabcontent]
[wptabtitle] Scene View[/wptabtitle] [wptabcontent]
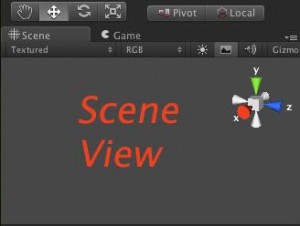
This is your 3D view, though it differs from 3D views in Blender or Cinema4D. You don’t edit 3D geometry directly in this view. Rather, you use it to place things precisely where you wish them to go. If you wish to edit your geometry, you’ll either need to open it up in a 3D modelling application or install additional components into Unity. You can also see the hierarchical structure of how your scene is composed in the Hierarchy panel below.[/wptabcontent]
[wptabtitle] Basic Movement in the Scene View[/wptabtitle] [wptabcontent]Unity uses key shortcuts similar to Autodesk Maya, but you can change them easily by going to Edit > Preferences.
Look around in your scene
1. Hold Right Mouse Button (RMB) while dragging your mouse sideways will rotate the camera in place.
Rotate around in your scene
1. Holding ALT and press Left Mouse Button (LMB).
Zoom In and Out
1. Hold ALT and RMB, and then drag your mouse in or out or sideways.Alternatively, you can use the drag wheel
Centering on an object.
1. Select an object either in the Scene view or the Hierarchy view.
2. Make sure your cursor is hovering over the Scene view.
3. Press ‘F’ to “focus” in on your object.
[/wptabcontent]
[wptabtitle] Basic Object Manipulation [/wptabtitle] [wptabcontent]
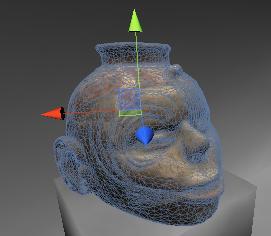
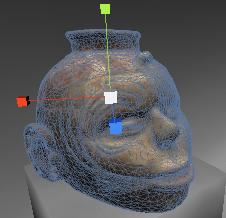
You can use the controls in the top left corner to get into any mode.
The gizmos around the selected object in the Scene will change depending on which mode you are in.
‘W’ : Will put you into Move model
‘R’ : Scale mode
[/wptabcontent]
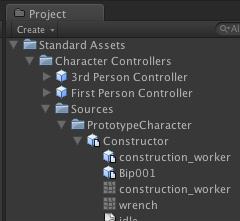
[wptabtitle] The Project Panel[/wptabtitle] [wptabcontent]The Project panel is your library of readily available assets you can use in your current scene. Any models or artwork you wish to place into a scene can be dragged from this panel to either the Scene view or the Hierarchy view. When you want to add assets into the Project panel, just save them to the Asset folder inside the Project folder you created at the start. If you have trouble locating where you saved your Unity project, right click on any asset in the Project panel and click on Show in Explorer.
Unity also provides a number of assets ready to go. These are located in the folder named Standard Assets. If you do not find a particular asset here, you might not have imported them when you created the project.
You can easily reimport them by going to Edit -> Import Packages -> DesiredPackage. We will look at the packages in more in depth in the next chapter.
[/wptabcontent]
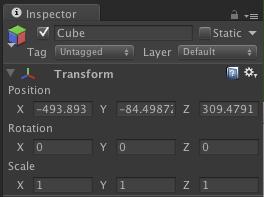
[wptabtitle] The Inspector[/wptabtitle] [wptabcontent]Finally at the far right is the Inspector. This shows attributes of what you have selected. If you just have an empty game object selected, it will only show you the Transform attributes, which are its Position, Rotation and Scale. This is the base component of all GameObjects. You can position, rotate, and scale objects precisely using the coordinates in this field.
GameObjects are the heart and soul of Unity. Everything in Unity is a GameObject and you add functionality by adding Components to GameObjects much like adding layers to a Photoshop document. Common components are Character Controllers, Rigidbody, Particle Systems, and Audio Files. You can add custom functionality by creating scripts and adding them as components to various GameObjects. You can create subtle complex interaction by layering a few components to various gameobjects.
 [/wptabcontent]
[wptabtitle] Continue…[/wptabtitle] [wptabcontent]Continue to learn about Modeling and Unity here[/wptabcontent][/wptabs]
