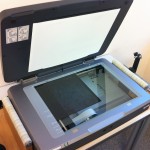
This document will guide you through using the Epson 10000XL Flatbed Scanner and SilverFast plugin to scan film for many applications including use in photogrammetry and archival storage.
Hint: You can click on any image to see a larger version.
[wptabs style=”wpui-alma” mode=”vertical”] [wptabtitle] GETTING STARTED [/wptabtitle]
[wptabcontent]
Transparency Unit – The EPSON 10000 XL scanner should have the transparency unit attached. If it is not attached, the user needs to turn off the power of the scanner, remove the regular cover, and attach the transparency unit. The transparency guide is not needed for scanning film.
1 – Put on white gloves when handling film to avoid fingerprints rubbing onto film.
2 – Take film out of canister and find the glossy side, which will need to be face down for scanning.
3 – Unroll film to find flight direction markings, which are usually at the beginning of the roll. If there are none, then use your own judgment on flight direction so film data is correctly oriented.
4 – Put film on roller that allows film to feed through scanner with the glossy side down and with the data correctly oriented; switch spindles if necessary. This can be changed if the user later discovers that the film is incorrectly oriented.
5 – Push bars of rollers together to a distance with the film right between them and then tighten the knobs of the rollers.
[/wptabcontent]
[wptabtitle] PLACING FILM [/wptabtitle] [wptabcontent]
6 – Open Adobe Photoshop program and click on file, import, and select the Silverfast program.
7 – Roll the handle on the roller to feed film onto scanner. Film should be scanned at the top of the scanner. Rollers can be adjusted as necessary and scanner can be moved so the film is rolled across the top.
8 – When scanning portions of film that are not on the edge of the roll, attach the end of the film to the opening on the spindle of opposite roller.
9 – Once film is attached to spindle, use this roller to unroll and feed film through the scanner.
[/wptabcontent]
[wptabtitle] GENERAL SETTINGS [/wptabtitle] [wptabcontent]
10 – After Silverfast opens, click on Pre-Scan button at lower left corner for visualization of imagery. This provides an initial preview. Settings need to be changed as listed in the following step.
11 – Select the general tab and set the following settings:
1 – Scan mode-normal
2 – Original– reflective
3 – Pos/neg– positive
4 – Frame-set– save
[/wptabcontent]
[wptabtitle] SCAN QUALITY [/wptabtitle] [wptabcontent]
12 – Select the frame tab to control quality of scanning procedures and set
the following settings:
1 – Scan type – 16-8 bit grayscale
2 – Filter – GANE, to maximize dust and grain removal settings
3 – Setting – save
4 – Image type – standard
5 – Name – untitled, user can add a title when saving image
6 – Original– this setting displays the width and height of area being scanned and can be changed by typing in values or clicking and dragging on box in preview window.
7 – Scale – 100
8 – Q-factor – 2.5, maximizes quality of scan
9 – Screen – 480 lpi
10 – Scanning resolution is below screen and q-factor, but unlabeled, set to 1200 dpi
11 – Click pre-scan again for new preview of imagery. Re-size window to include only the area of film that contains data.
[/wptabcontent]
[wptabtitle] SCANNING [/wptabtitle] [wptabcontent]
13 – If desired, check additional options by clicking on options button at right corner to open extra options menu. These options do not need to be changed from default settings.
14 – If desired, check additional options located on top row of SilverFast menu, such as histogram and gradation curve adjustment – alter as the user sees fit. The auto-adjust tool is also located on this row and can improve scanned imagery if needed.
15 – Click on Scan button at bottom of tab to begin scanning imagery.
16 – Saving : Scanned imagery is loaded into Adobe Photoshop. The user needs to name the file and save it to a folder of your choice as a .tiff file.
[/wptabcontent]
[wptabtitle] FINISHING SCANS / GENERAL TIPS [/wptabtitle] [wptabcontent]
17 – Continue rolling film as needed to scan imagery and repeat scanning process.
18 – When finished scanning, use the roller on the original spindle to roll the film back.
TIPS
For clear scans : When scanning aerial photography, the user needs to either place sheets of paper behind the film or put the cover back over the transparency unit glass portion. It is also possible that this process could improve scanning results of other series as well.
Distortion : Each roll of film tightens as the user rolls the film through the scanner and attaches it to the roller on the opposite side. Occasionally, this results in the film becoming very tight and resists laying down flat on the scanner bed. When this happens, the portions of the scanned image on the edge of the scanner bed become distorted. Unrolling some of the film on the receiving roller relieves some of the tightness, but does not totally eliminate distortion from the image. The best way to eliminate the distortion is to select not to scan the area that is distorted during the pre-scan.
[/wptabcontent]
[/wptabs]
