These tutorials will show you how to digitize archaeological features from terrestrial scan data.
Hint: You can click on any image to see a larger version.
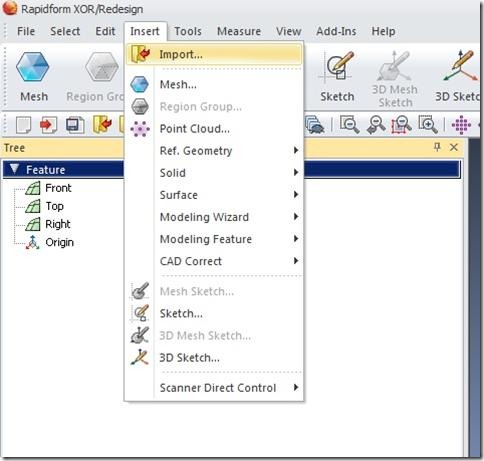
Fig. 5: Import Data into Rapidform
[/wptabcontent]
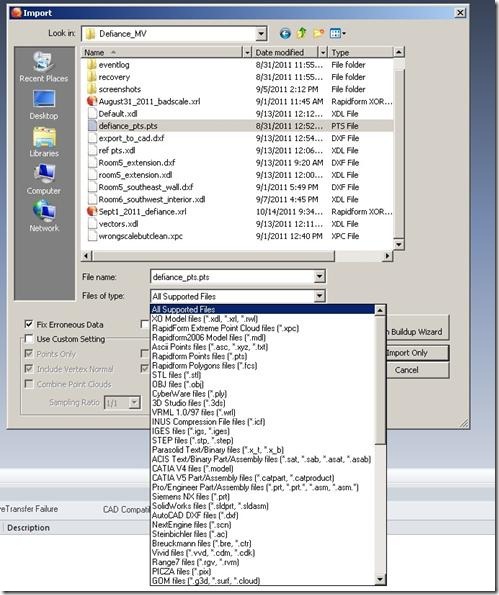
[wptabtitle] SELECT A FILE TO IMPORT[/wptabtitle] [wptabcontent]-Select the file containing scan data which you wish to import. For a list of valid file types, open the “Files of Types” dropdown menu.
Fig. 6: Supported file types are listed in the import menu dropdown.
[/wptabcontent]
[wptabtitle] IMPORT ONLY OR MESH ON IMPORT?[/wptabtitle] [wptabcontent]Decide whether or not you want to mesh your data now. If you want to inspect your data before meshing, select “Import only”. If this is the first time you’re working with the dataset, “Import only” is probably a good idea.
[/wptabcontent]
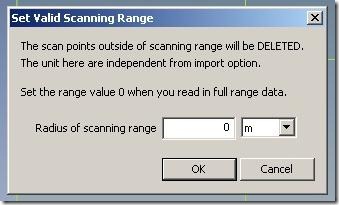
[wptabtitle] SET THE SCAN RANGE[/wptabtitle] [wptabcontent]Set the Valid Scan Range to zero to import all the data.
Fig. 7:Setting the Valid Scan Range.
[/wptabcontent]
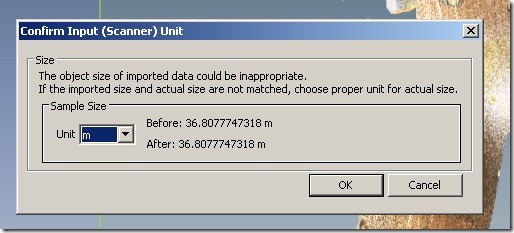
[wptabtitle] CONFIRM THE SCALE AND THE UNITS[/wptabtitle] [wptabcontent]Confirm that your data is imported at the correct scale and make any necessary adjustments by setting the “Unit” value.
Fig. 8: Input values should always be checked at the start of a project.
[/wptabcontent]
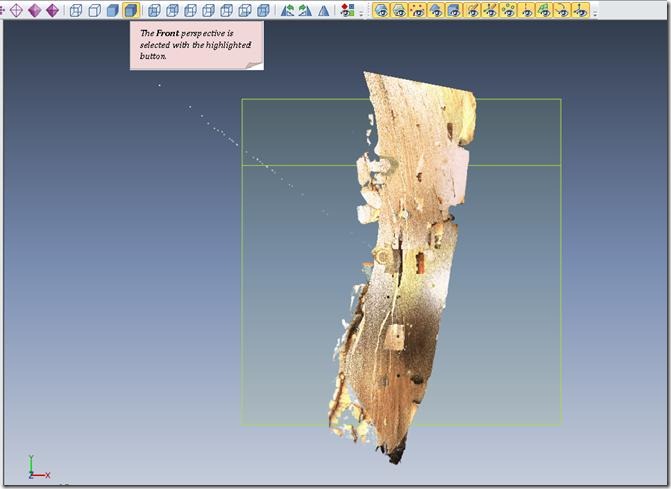
[wptabtitle] CHECK THE ALIGNMENT[/wptabtitle] [wptabcontent]Check the alignment of the scan data and adjust if necessary. A common adjustment is forcing Z to be up. Adjusting the alignment will allow you to use the “Viewport” buttons intuitively because the “Top” viewport will show your data from the top.
Fig. 9: The scan is misaligned when first imported. The front perspective shows a view from the top in this figure.
[/wptabcontent]
[wptabtitle] INTERACTIVE ALIGNMENT WIZARD STEP 1[/wptabtitle] [wptabcontent]Looking at the scan data from the Front perspective the model is incorrectly aligned.
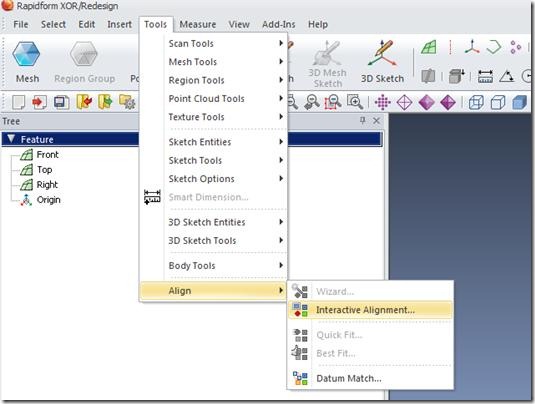
Use the interactive alignment wizard to change this by going to “Tools” and choosing “Align” and “Interactive alignment”.
Fig. 10: The Interactive Alignment tool.
[/wptabcontent]
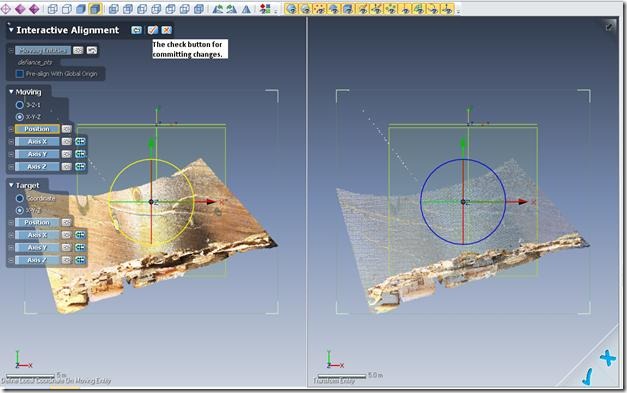
[wptabtitle] INTERACTIVE ALIGNMENT WIZARD STEP 2[/wptabtitle] [wptabcontent]Select and move the x, y, and z axes in the left-hand window to adjust the alignment of the scan data. Your adjustments will be reflected in the right-hand window. When you are satisfied with your changes, click the “check” button.
Fig. 11: Navigation in the Interactive Alignment tool.
[/wptabcontent]
[wptabtitle] CONTINUE TO GENERATING A MESH[/wptabtitle] [wptabcontent]Now that your scan data is properly imported, scaled and aligned you are ready to generate a mesh. Continue to Generating a Mesh in Rapidform.
[/wptabcontent] [/wptabs]
